As an Amazon Associate I earn from qualifying purchases

Sunday, October 27, 2013

Bases . . . and Perry Miniatures ECW Cavalry WIP #3

I had a friend ask me a while back how I do my bases.  I am a firm believer that a good base can make an average paint job (mine) look fantastic.  Here is my "generic" temperate area base using GW paints (old color in parentheses):

1. I use either hobby sand or a resin - pumice mix that is easy to apply and paint.  I was out of the resin - pumice mix so I used hobby sand this time around.  I liberally apply white glue slightly watered down and spread it all over the base.  I then spread the sand over the entire base and I let it dry at least overnight.  When I use the resin - pumice mix I also let it dry overnight.


2.  Next I paint the sand using Rhinox Hide (Scorched Brown).


3. After it is dry, I "wet brush" with Mournfang Brown (Bestial Brown).  Pause as I stop laughing at the new GW names for paint.


4.  Next step is to dry brush with Ushabti (snicker!) Bone (Bone White).


5. Now pull out the ole white glue again.  I use just regular Elmer's glue to add static grass to the bases.


 I use two different brands for static grass depending on which is cheaper at the moment:  GW's and Gale Force Nine.


Gale Force Nine is the cheaper right now and has a greater variety of colors.

I do not use hummus on my bases, but plastic containers are easier to use to store and apply the static grass on bases.

I put blobs of white glue in random patterns around the base and then I use a brush with water on it to thin the glue and spread it around.  With sand, I make sure the glue is spread on the bases of the figures to hide the base.  With the resin mix, I cover the base.

 Globs of glue.


Globs of glue watered down and spread around.

 
6. Take the bases and either sprinkle the static grass on the base or put the base in the pile of static grass and allow it to spread around. 


7.  Shake off the loose static grass over your container.


8.  Optional is to add tufts of grass, available at most hobby shops or extra rocks.  I glue the tufts and any other scenic material using super glue.  


Tah dah!  All done.  The process does not take long.  I put the sand on yesterday and did all of the painting, etc. throughout the afternoon while I waited for paint and glue to dry.  The actual total work time was probably about 45 minutes. Now all I have to do is apply a flat clear protective coating . . . and get some command figures for these troops!

Saturday, October 19, 2013

Perry Miniatures ECW Cavalry WIP #2


Almost finished with the Perry Miniatures ECW cavalry.  I don't think I have used so many different kinds of brown paints and shades in my entire life.


 A few extra pictures mainly because of love the animation of the figures - beautiful sculpts.  Time to get some command now!


Tuesday, October 15, 2013

Perry Miniatures ECW Cavalry WIP

Honorable Son #3 and #4 gave me 2 packs of Perry Miniatures English Civil War Cavalry for Father's Day.  One pack is Horse with pistol and assorted head gear and the other is Horse attacking with helmets.  Three horse and riders come with each pack which is perfect for the rules I am using, Victory Without Quarter.  Each cavalry stand has 2 - 3 figures mounted on a 80mm x 60 mm base with 2 bases representing a troop of cavalry. What I particularly liked about the horses were the various gunpowder magazines and extra pouches strapped on to the pistol holders.

Lately for metal figures I have been priming with thinned down Games Workshop Chaos Black (or whatever the new name) to bring out the detail in the figures.  Although it takes longer to prime this way, instead of using a can of spray paint, it more than makes up for it with the detail easier to see.


My favorite figure of the bunch.


You probably guessed that this figure is from the Horse, charging, helmeted pack!


After viewing various sources on the web and in books, I decided I should do a test figure first.  Even though I have painted many infantry figures, I wanted to experiment with different shades of brown to give variety to the figures as the "leather" would all be slightly different.  The only exception I decided would be that the  leather buff coats would be painted the same to give an appearance of uniformity to the unit. For the buff coats, I'm using a base of GW's Bestial Brown followed by two thinned down coats of Bubonic Brown (and I have officially stopped keeping track of the new names for the GW paints mainly because I can't remember what they are called and I don't feel like walking over to my painting table to check . . . okay, I got that off my chest).  

I used a base of Bestial Brown for the horse followed by Snakebite Leather and a thin wash of Bestial Brown.  For the blackened armor, I gradually built up the color with thinned down Chaos Black.  Time consuming on the armor, but well worth it!  The pictures do not really give the armor justice.  The boots right now are just Bestial Brown but I will probably go over them with a dark brown wash and then give them some highlights with Snakebite Leather.


I don't remember where I read it first, but on another gaming blog it was suggested to keep a notebook journal on painting projects in order to "remember" how you painted a particular figure or how you did the basing.


Here is my painting and army organizing journal that I think cost around $5 US dollars at the local bookstore.


Just a few pages showing how I kept track when I was painting British WW II, Soviet Naval infantry and German Fallschirmjager (paratroopers) for Flames of War.


As you can see, I am keeping extensive notes for both the infantry and the cavalry.  If you look closely enough, you can get a hint of the next infantry unit I will be doing!


Friday, October 4, 2013

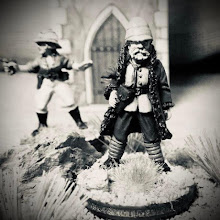
Warlord Games ECW Cleric

Here is the final figure from the Fire and Brimstone ECW blister pack from Warlord Games: The Cleric.  The Warlord Games website states that the figure is based on Archbishop Laud who was executed by Parliament.  


When I pulled the figure out the pack the sword was bent and when I tried to straighten it I broke it off!  Fortunately for me I had quite a few extra plastic swords from the Warlord Games plastic infantry boxes.  I was able to successfully trim one and glue it on.  For painting I used the same "layering" approach for the black by applying thinned down coats.  For the white blouse I used a base of Games Workshops' Bestial Brown (or whatever the new name is) highlighted with Bone White and then Skull White.


The figure will also be used as a morale marker for Victory Without Quarter.