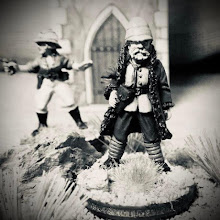

For the carriages I used GW's Adeptus Battlegrey. Honorable Son #5 once again provided the great pictures.


Most young boys (and some adventurous girls) play with Toy Soldiers; some never stop! I'm proud to say that I am one that never has stopped. Toy Soldiers, painting the figures, history and miniature wargaming is what this site is all about. May the God who gives encouragement give you the same attitude of mind toward each other that Christ Jesus had, so that with one mind and one voice you may glorify the God and Father of our Lord Jesus Christ.


 I'm a retired Colonel of Infantry (Regulars by God!) and Military Historian who likes to play with toy soldiers. I've been married to the love of my life since 1986, I have 5 honorable sons (my geeks in training), 4 daughters-in-law, al2 grandsons, 1 granddaughter, 1 dog and a gazillion miniatures.
Hobbies include . . . wait for it . . . Toy Soldiers, Reading, Wargaming, Reading about Toy Soldiers, History, Reading about Wargaming, Gardening, Reading about History and Reading.


 Some other views of the 25th Dragoons; almost ready to start play testing Napoleonic scenarios for Volley and Bayonet.
 I'm a retired Colonel of Infantry (Regulars by God!) and Military Historian who likes to play with toy soldiers. I've been married to the love of my life since 1986, I have 5 honorable sons (my geeks in training), 4 daughters-in-law, al2 grandsons, 1 granddaughter, 1 dog and a gazillion miniatures.
Hobbies include . . . wait for it . . . Toy Soldiers, Reading, Wargaming, Reading about Toy Soldiers, History, Reading about Wargaming, Gardening, Reading about History and Reading.