As an Amazon Associate I earn from qualifying purchases

Saturday, August 13, 2022

Tips for Modeling and Assembly of Perry Miniatures Afghan Tribal Infantry, Part 2

This is what the completed unit looks like - we will get there!

Now that the figures are primed and dry let's paint those Afghan Tribesmen for The Men Who Would be Kings or other Colonial rules.


My preferred method for painting all figures is to do the faces and and other exposed portions of skin. For me, it brings out the "personality" of the figure and inspires me as to how I paint it. Trust me (you'll see later) I'll change my mind on what I'm doing based on inspiration. All of the paints will be Vallejo, unless mentioned. For my Afghans I have used two paints at different times for the base, Dark Flesh and Medium Fleshtone. For these figures I will use Dark Flesh.


Here are the other two figures.


For depth and shading I take Flat Brown and water it down and put it all over the flesh parts. If it's too dark I add some more water - if there is too much water, I use a Kleenex to soak it off.


I then did the highlights with Dark Flesh and painted the hair Flat Black.


For clothing of Afghan Tribesmen, you can never go wrong with white. There are numerous photographs, illustrations and descriptions on the internet. Many commentators mention the Afridi tribe as having blue and black - but in all of the photographs and illustrations of the late 19th century I have seen of the Afridi's they did have some blue and black but various shades of white were the predominate color. There are different techniques for white; sometimes I use a grey base and sometimes a brown base. This time I'm using Flat Brown as the base. The color looks shiny because the paint was still wet when I took the picture.


As I mention there are a gazillion resources on the clothing on the internet - some of the best are contemporary! The figure on the left has been painted with Prussian Blue and a red cummerbund, the next figure a red turban, etc. I try to do all of the same color at the same time as that saves time. Painting irregulars takes time as you cannot set up an assembly line process. In fact, what works for me is to paint 6 figures at a time.

Here you can see my white technique. I'm not looking for a miniature masterpiece, just something that looks realistic at gaming distance. The folds in the cloth I leave brown and I'm not concerned that the white on the rest of the fabric would not pass inspection at Whitehall. I used Buff on the figure on the right and highlighted the figure on the right with Dark Blue.


I'm not going to bore you with highlighting, etc. I usually use a base and then highlight it. The edged weapons are painted with Silver and some of the hilts are Gold. Now I'm going to glue the shields.

In looking at photographs and illustrations of the late 19th Century, some of the tribesman would have fancy striped cummerbunds or turbans. The vast majority did not but it does add some variety and color and is a good way to make your leaders stand out.

I forgot to mention that I glued on the trail scarf of the lead figure the same time as the shield. I have learned from experience (!) not to pick up the figure by the trail scarf or it will become time to re-glue. From looking at museum pieces, pictures and illustrations, the shields are various browns, black, and even what looks like shiny yellow. The lead figures shield was hand painted Flat Black first as a primer and then Mahogany Brown with Gold. The far shield is Leather Brown. The wood on the jezail was painted Mahogany Brown, the barrel Gun Metal and highlighted with Silver, and the barrel bands Gold. Sandals and foot ware are various browns.

Definitely a tribal leader. The cummerbund is Dark Prussian Blue highlighted with Dark Blue. 


Another view. The stripes look sloppy in the photograph but look just fine at gaming distance. Right when I was finishing the project, I remembered that I like to mount my leaders individually since they are the last (unless they are unlucky on the Leader Casualty roll) to die in a unit. So I decided to mount these four figures (there will be 16 in the unit) individually instead of as a group.


I use my hobby knife to carefully loosen the figures from the soda caps so as not to accidentally pull of shields, etc. The figure above also shows how to make the cummerbund look "fancy" to give the figure some color but not look unrealistic.


As I mentioned earlier, I decided while painting to mount all of these figures individually. I use Litko wood bases and these are 25mm diameter.

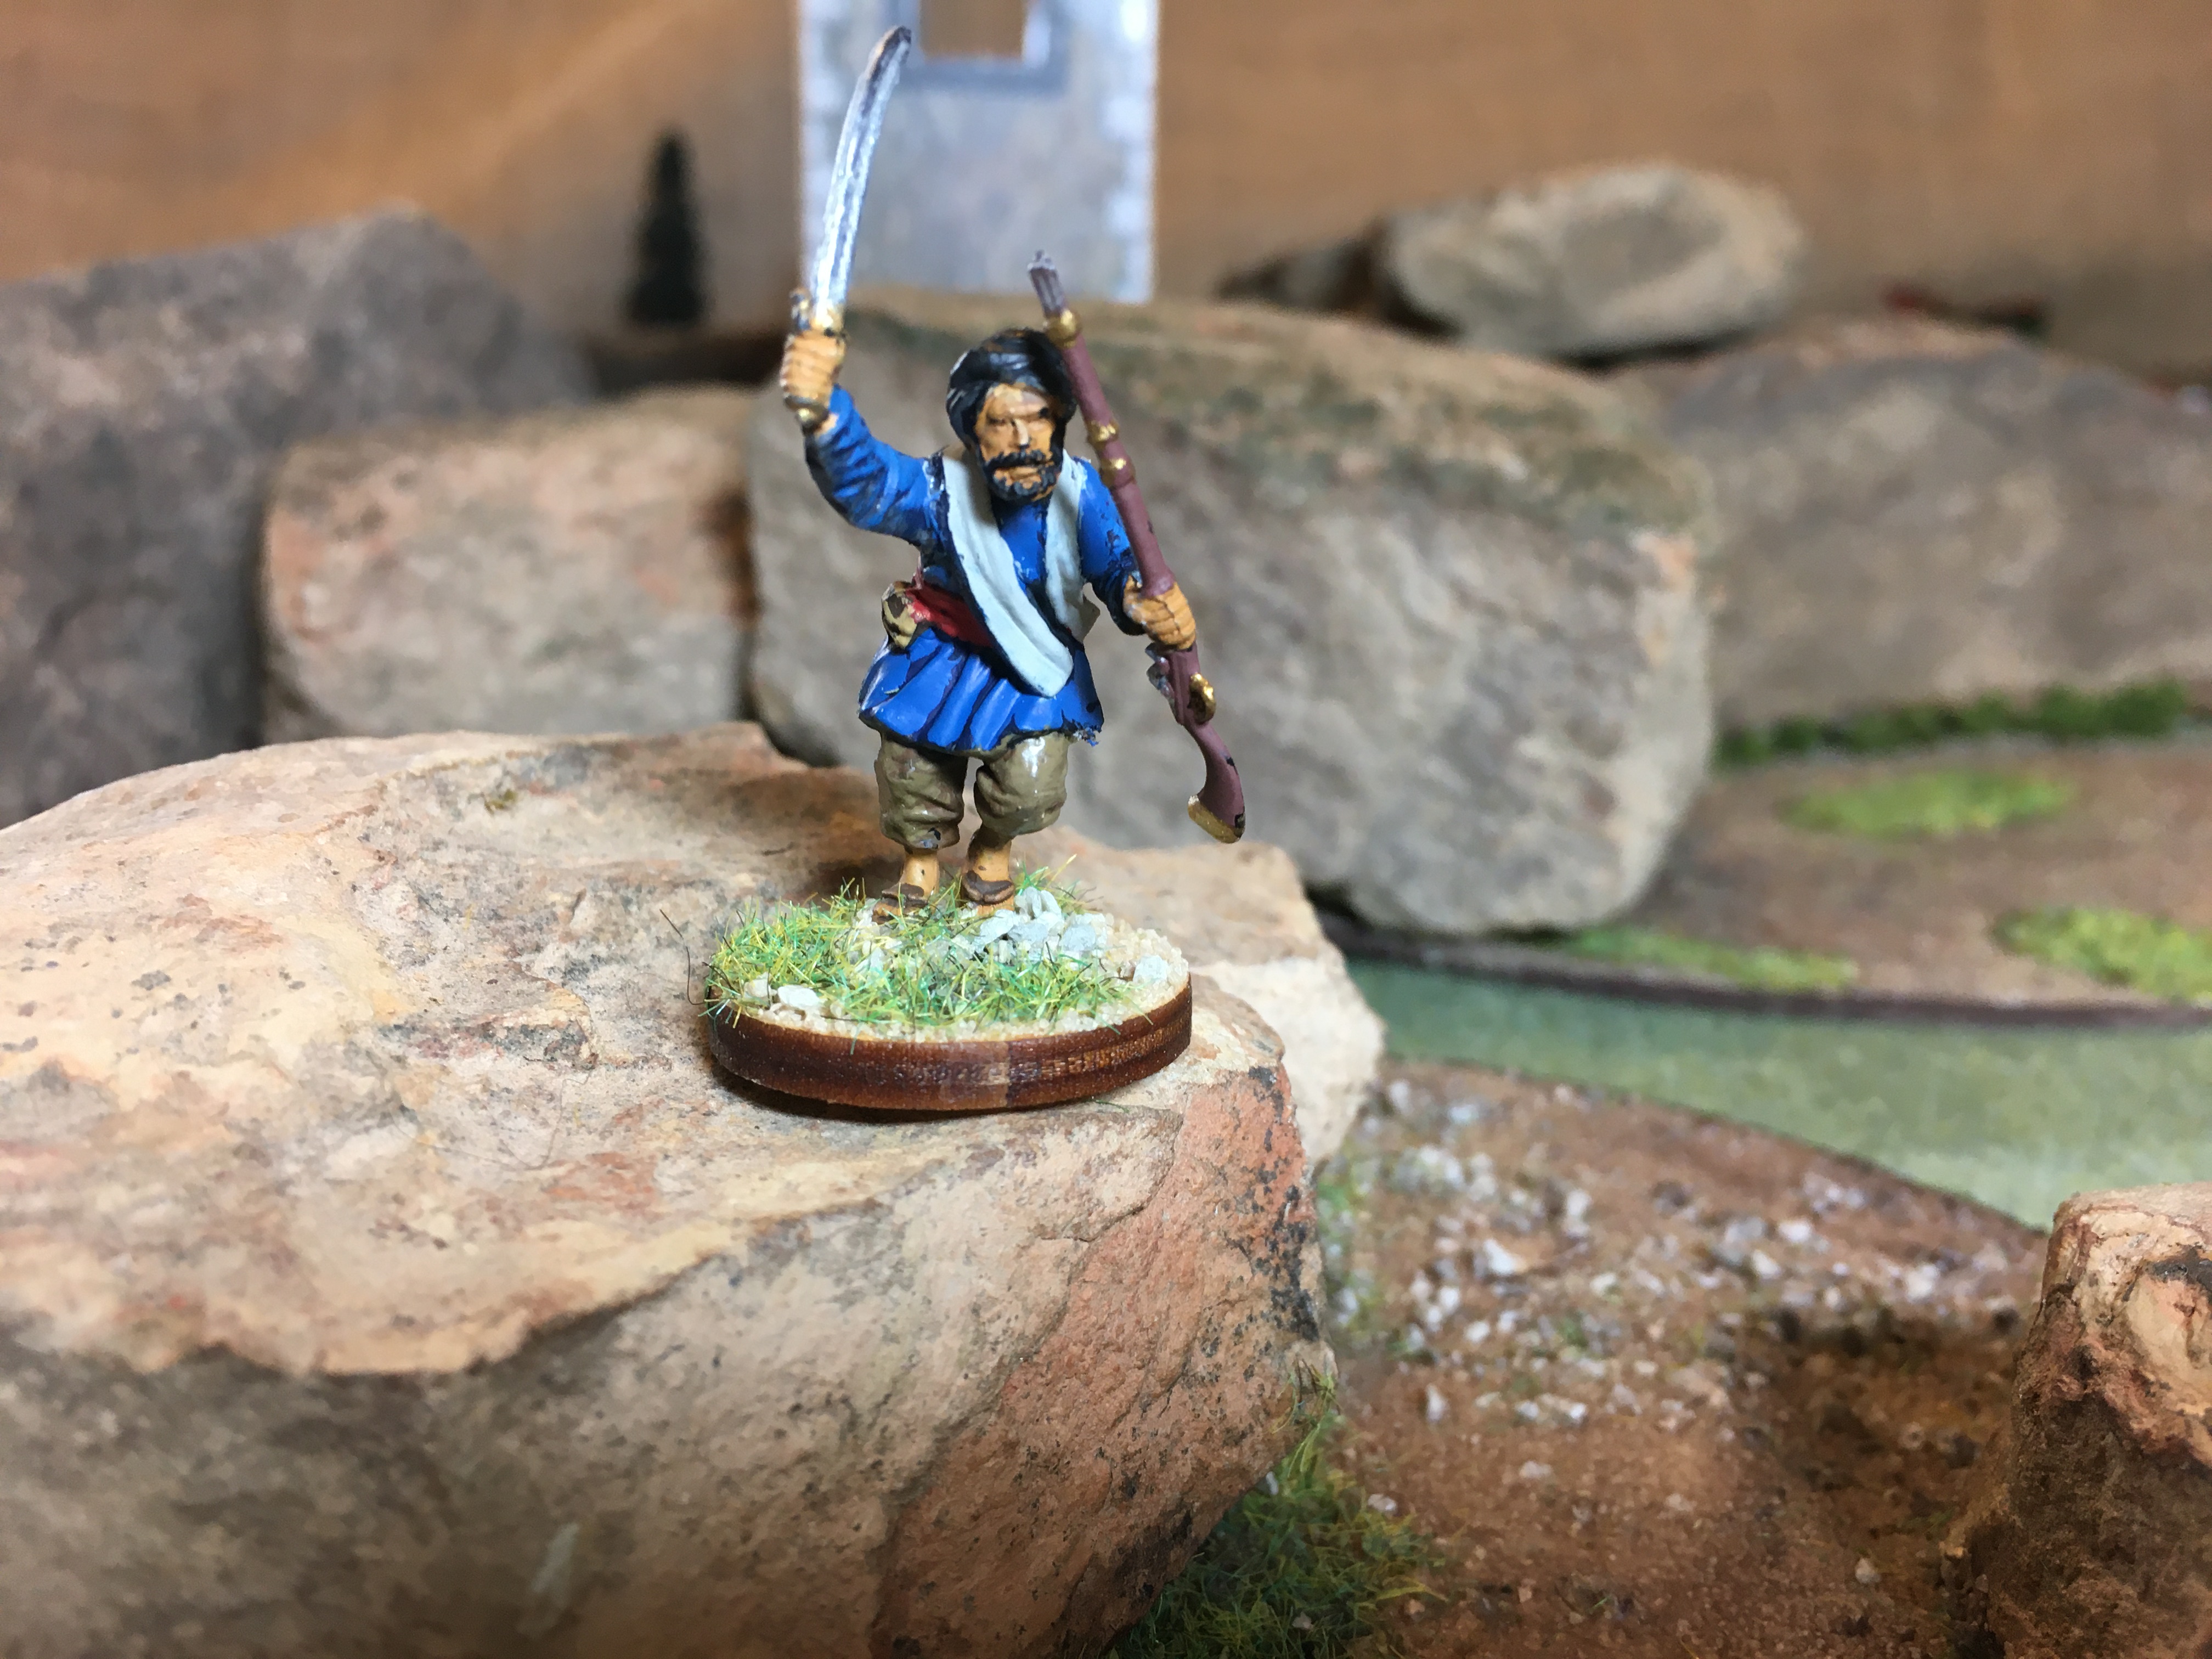
Here is another figures that I believe shows what can be achieved just by repositioning some parts. The arm with the rifle is usually being carried in previous figures I have done and have seen done. By simply repositioning it and another arm pointing up, and pushing the head back like he is yelling, it provides a simple figure with from the base model with more realistic animation. I added an extra tulwar in scabbard and below you can see I painted a red stripe on the cummerbund based on a contemporary photo.


Ironically I initially based the figure that looks like Sean Connery on a single base, but before I added sand and a sealer, I changed my mind and added him to a vignette! For the bases I simply use watered down white glue and dip it in my handy dandy container of sand. Once it dries I had another watered down layer of white glue to help hold the larger "rocks" in place. Once that is dry (you guessed it) I use watered down white glue in some areas and add static grass. Here are the completed figures:


Up next: Adding some spice to individual bases and multi-figure unit vignettes.

Friday, July 29, 2022

Tips for Modeling and Assembly of Perry Miniatures Afghan Tribal Infantry, Part 1


I have become a big fan of Perry Miniatures Hard Plastic Afghan Tribesmen over the last year and wanted to pass on some tips that I have learned now that I am starting my second box. Now these are only the "tips" and "techniques" that I use and learned while putting together the miniatures - don't feel you have to do it my way. This is what works for me and I have had fun!


I base my figures for The Men Who Would be Kings, and fortunately, it works for other popular rules. I like to do circular bases with 1 figure, 2 figures and 3 figures which allows some creativity and the ability to make some "vignettes". What I do first (after experimentation with the first figures!) is get a minds eye of what I what on the bases and the overall look of the unit. The unit I chose to walk you through is a "Tribal Infantry" unit - so expect a lot of swords and men that want to get up close and personal with the enemy. Here is my preferred method step by step:


The first thing I do is to make sure the figures I want to use will fit on the base. Even though there are 4 figures above, for now I'm going to concentrate on a 3 figure base. The figures will be charging and note that I have trimmed one of the figure bases so it will fit properly on the circular base I am using. I then use white glue to adhere the bodies to carbonated beverage lids.


Once the bodies have dried on the caps, I then start experimenting with how I want the arms positioned. I have found it easier to do the arms on the bodies once they are firmly affixed to the caps instead of putting the whole figure together and then gluing it to the caps. Whichever method works for you I would do. Regular modelling glue is what I use and since it melts the plastic to get a good bond, check the position of the arm you want!


Get creative with the placement of the heads. The first figures I did I positioned the heads facing forward in line with the direction of the bodies. It's amazing that just by tilting or moving the head left or right adds a dynamic to the figure.

My very first figure. "Sir! My eyes are straight ahead so I can see the enemy, Sir!"

Now some fun which is why I love hard plastic figures. (The price doesn't hurt either) I have the decide that the figure all the way in the back in the picture of unpainted that I just added the heads to will be carrying a jezail. Well, there are no arms that are carrying a jezail for a charging figure - but there are plenty of spare jezails with the box.

One of the spare jezails.


What I did next was look at pictures of men running with rifles/muskets to get an idea where the closed hand that is gripping the jezail will actually be holding the jezail while running. I then brought the jezail up to the hand, carefully marked with my hobby knife where to cut and the then sliced that wonderful weapon apart.


I glued the bottom stock first and once dried, lined up the barrel and held it in place because let's face it, no one wants a crooked gun.


Here are two more of the figures that will be carrying shields. I do not glue the shields, scabbards, etc., on at this time because it makes it hard for me to paint the figure with the shield, scabbard, etc., in the way. We'll do those later.


It really doesn't matter whether you use white, grey, black or the color of your fancy to prime your figures. BUT PRIME YOUR FIGURES!!! Okay, that's the only part of this tutorial I'll make mandatory. Note I said nothing about washing the figures in warm, soapy water. Some people do but with hard plastic, I don't think it is necessary. But always prime your figures. Paint sticks to paint better and you'll thank me later. I usually use black as it can hide a multiple of painting sins and for me, helps with the shading.

I paint figures for how they will look at gaming distance.We'll get to my painting style in Part 2.


Tuesday, July 26, 2022

Operation Heinlein: The Mobile Infantry (Okay, they are GW Space Marines)


"We are the boys who go to a particular place, at H-hour, occupy a designated terrain, stand on it, dig the enemy out of their holes, force them then and there to surrender or die. We're the bloody infantry, the doughboy, the duckfoot, the foot soldier who goes where the enemy is and takes him on in person. We've been doing it, with changes in weapons but very little change in our trade, at least since the time five thousand years ago when the foot sloggers of Sargon the Great forced the Sumerians to cry "Uncle!"

Maybe they'll be able to do without us someday. Maybe some mad enius with myopia, a bulging forehead, and a cybernetic mind will devise a weapon that can go down a hole, pick out the opposition, adn force it to surrender or die--without killing that gang of your own people they've got imprisoned down there. I wouldn't know; I'm not a genius, I'm an M.I. In the meantime, until they build a machine to replace us, my mates can handle that job--and I might be some help on it, too.”     

On a whim, since I've been playing with Contrast Paints for my 19th Century Indian Army, I purchased a GW magazine that had some snap fit Space Marines. I love the snap fit! Advantage: No glue, easy to put together and the parts fit. Disadvantage: Limited conversion possibilities but I'm sure I'll figure something out.

“I hate to tell you this, but you are just stupid and eager and sincere enough to make the kind of officer that men love to follow into some silly predicament.”   

Games Workshop, you either love 'em or hate 'em. Personally I think the company has done more to promote the gaming industry than just about anyone. Between the way they package their games to give you everything you wanted to their pioneering work in hard plastic, they have pushed the gaming industry to get better and better. Now their prices . . . the purpose of a business is to make money . . . and that's why there is eBay.

“There are no dangerous weapons; there are only dangerous men.” (Note: I hope the ribbons don't get stuck in the upper receiver and bolt)

I used to play a lot of Warhammer and Warhammer 40K. Price drove me away from Warhammer plus the silliness of "The Age Of Sigmar" - I prefer now Dragon Rampant. I like hard Science Fiction and Warhammer 40K got too weird. Don't get me wrong; I love the Space Orks and the Eldar were pretty cool. But the cult of the God-Emperor, Space Demons and the overall depression of their universe started to wear thin on me. On the other hand, they did come up with the Tau which is my kind of alien race! But the price!

Social responsibility above the level of family, or at most of tribe, requires imagination-- devotion, loyalty, all the higher virtues -- which a man must develop himself; if he has them forced down him, he will vomit them out.” 

I do like what they are now doing with their new box games (cough, cough, price) and I'm thinking of giving 40K another go - but without the gothic silliness that turned me off. I have always been a big fan of Starship Troopers, by Robert Heinlein (the book, not the abomination of a movie) so my Space Marines will be basically the Terran Federation Mobile Infantry. In fact, Starship Troopers was one of the major influencers in my decision to serve in the Infantry for 26 years. And this quote from the book is true: “Happiness consists in getting enough sleep. Just that, nothing more.”

“Citizenship is an attitude, a state of mind, an emotional conviction that the whole is greater than the part...and that the part should be humbly proud to sacrifice itself that the whole may live.”   

All of the figures, except for the bases, were painted with GW Contrast paints. I primed them with Krylon Flat White spray paint as I like my figures to be a bit lighter to let them stand out at gaming distance. For the record, the GW spray paint is great quality spray paint, and the cost is for great quality primer. For the armor I used Contrast Ultra Marine (duh!) blue being careful to leave the leather, seals and ribbons white. The leather and ribbons were painted with Contrast Snakebite Leather and the seal with Contrast Nazdreg Yellow. The bolter, chains word (who doesn't like a chain sword?) and parts of the armor were painted Contrast Chaos Black (BWAH HAH HAH!). That's it and 5 Mobile Infantry, err Space Marines, were done lickety split.

“The best things in life are beyond money; their price is agony and sweat and devotion . . . and the price demanded for the most precious of all things in life is life itself - ultimate cost for perfect value.” 


"I always get the shakes before a jump."