As an Amazon Associate I earn from qualifying purchases

Thursday, April 17, 2025

Operation Heinlein: Quick and Easy Painting guide for Armored Infantry


Okay; it’s a Space Marines (Copyright Games Workshop and if you don’t believe me I have some Demonic Chaos Lawyers to send your way). I’m building an armored infantry force of the Terran Federation for the game Xenos Rampant with GW deals I have been finding.


I’m a minimalist when it comes to painting Space Marines. For me, less is better and I don’t want the armor to be a “perfect” paint job! We are not on parade - we are wearing armor that has seen some action. Somehow to me, they look more intimidating.

I’m not sure when, but GW was selling random Blood
Angels that cameone to a box. I scarp this one up for $2 US dollars.


1. I used Citadel Contrast (CC) paints for this figure. When using enamels, you can use a lower quality primer. But for Contrast or Speed Paints, it’s well worth the money to invest in a good quality primer. I use Citadel Wraith Bone.

When painting my armored infantry I don’t get to concerned if the original color of the plastic shows - it will appear as “battle worn.”


2. I did the skin using a 50/50 mix of Vallejo Dark Flesh and Mahogany Brown.


3. Next up on the skin is a thin “wash” of CC Darkoath Flesh.


4. You guessed it! Paint the armor with CC Ultramarine. The inside of the armor is CC Black Templar.


5. The bolter (weapon) and other metal parts are done with CC Basilicum Grey. The belt, holster, and other leather pouches I used CC Snakebite Leather. The grenade in front was painted with Striking Scorpion Green and the grenade in the back is CC Aethermatic Blue.


6. The targeting device lense is CC Blood Angels Red and the concrete on the base is CC Space Wolves Grey.


7. The basing material I use for the ground are various grades of model railroad ballast mixed together. I put several globs of white glue on the base, grab an old handy dandy brush and I dip in water and then spread the glue so it’s watered down. I dip it in my “sandbox” container and then let it dry.

The color scheme I used was a base of Vallejo Luftwaffe Uniform WW II and then I dry brush Vallejo Neutral Grey followed by Vallejo Light Grey. After all of that is dry I add some green static grass with watered down white glue.

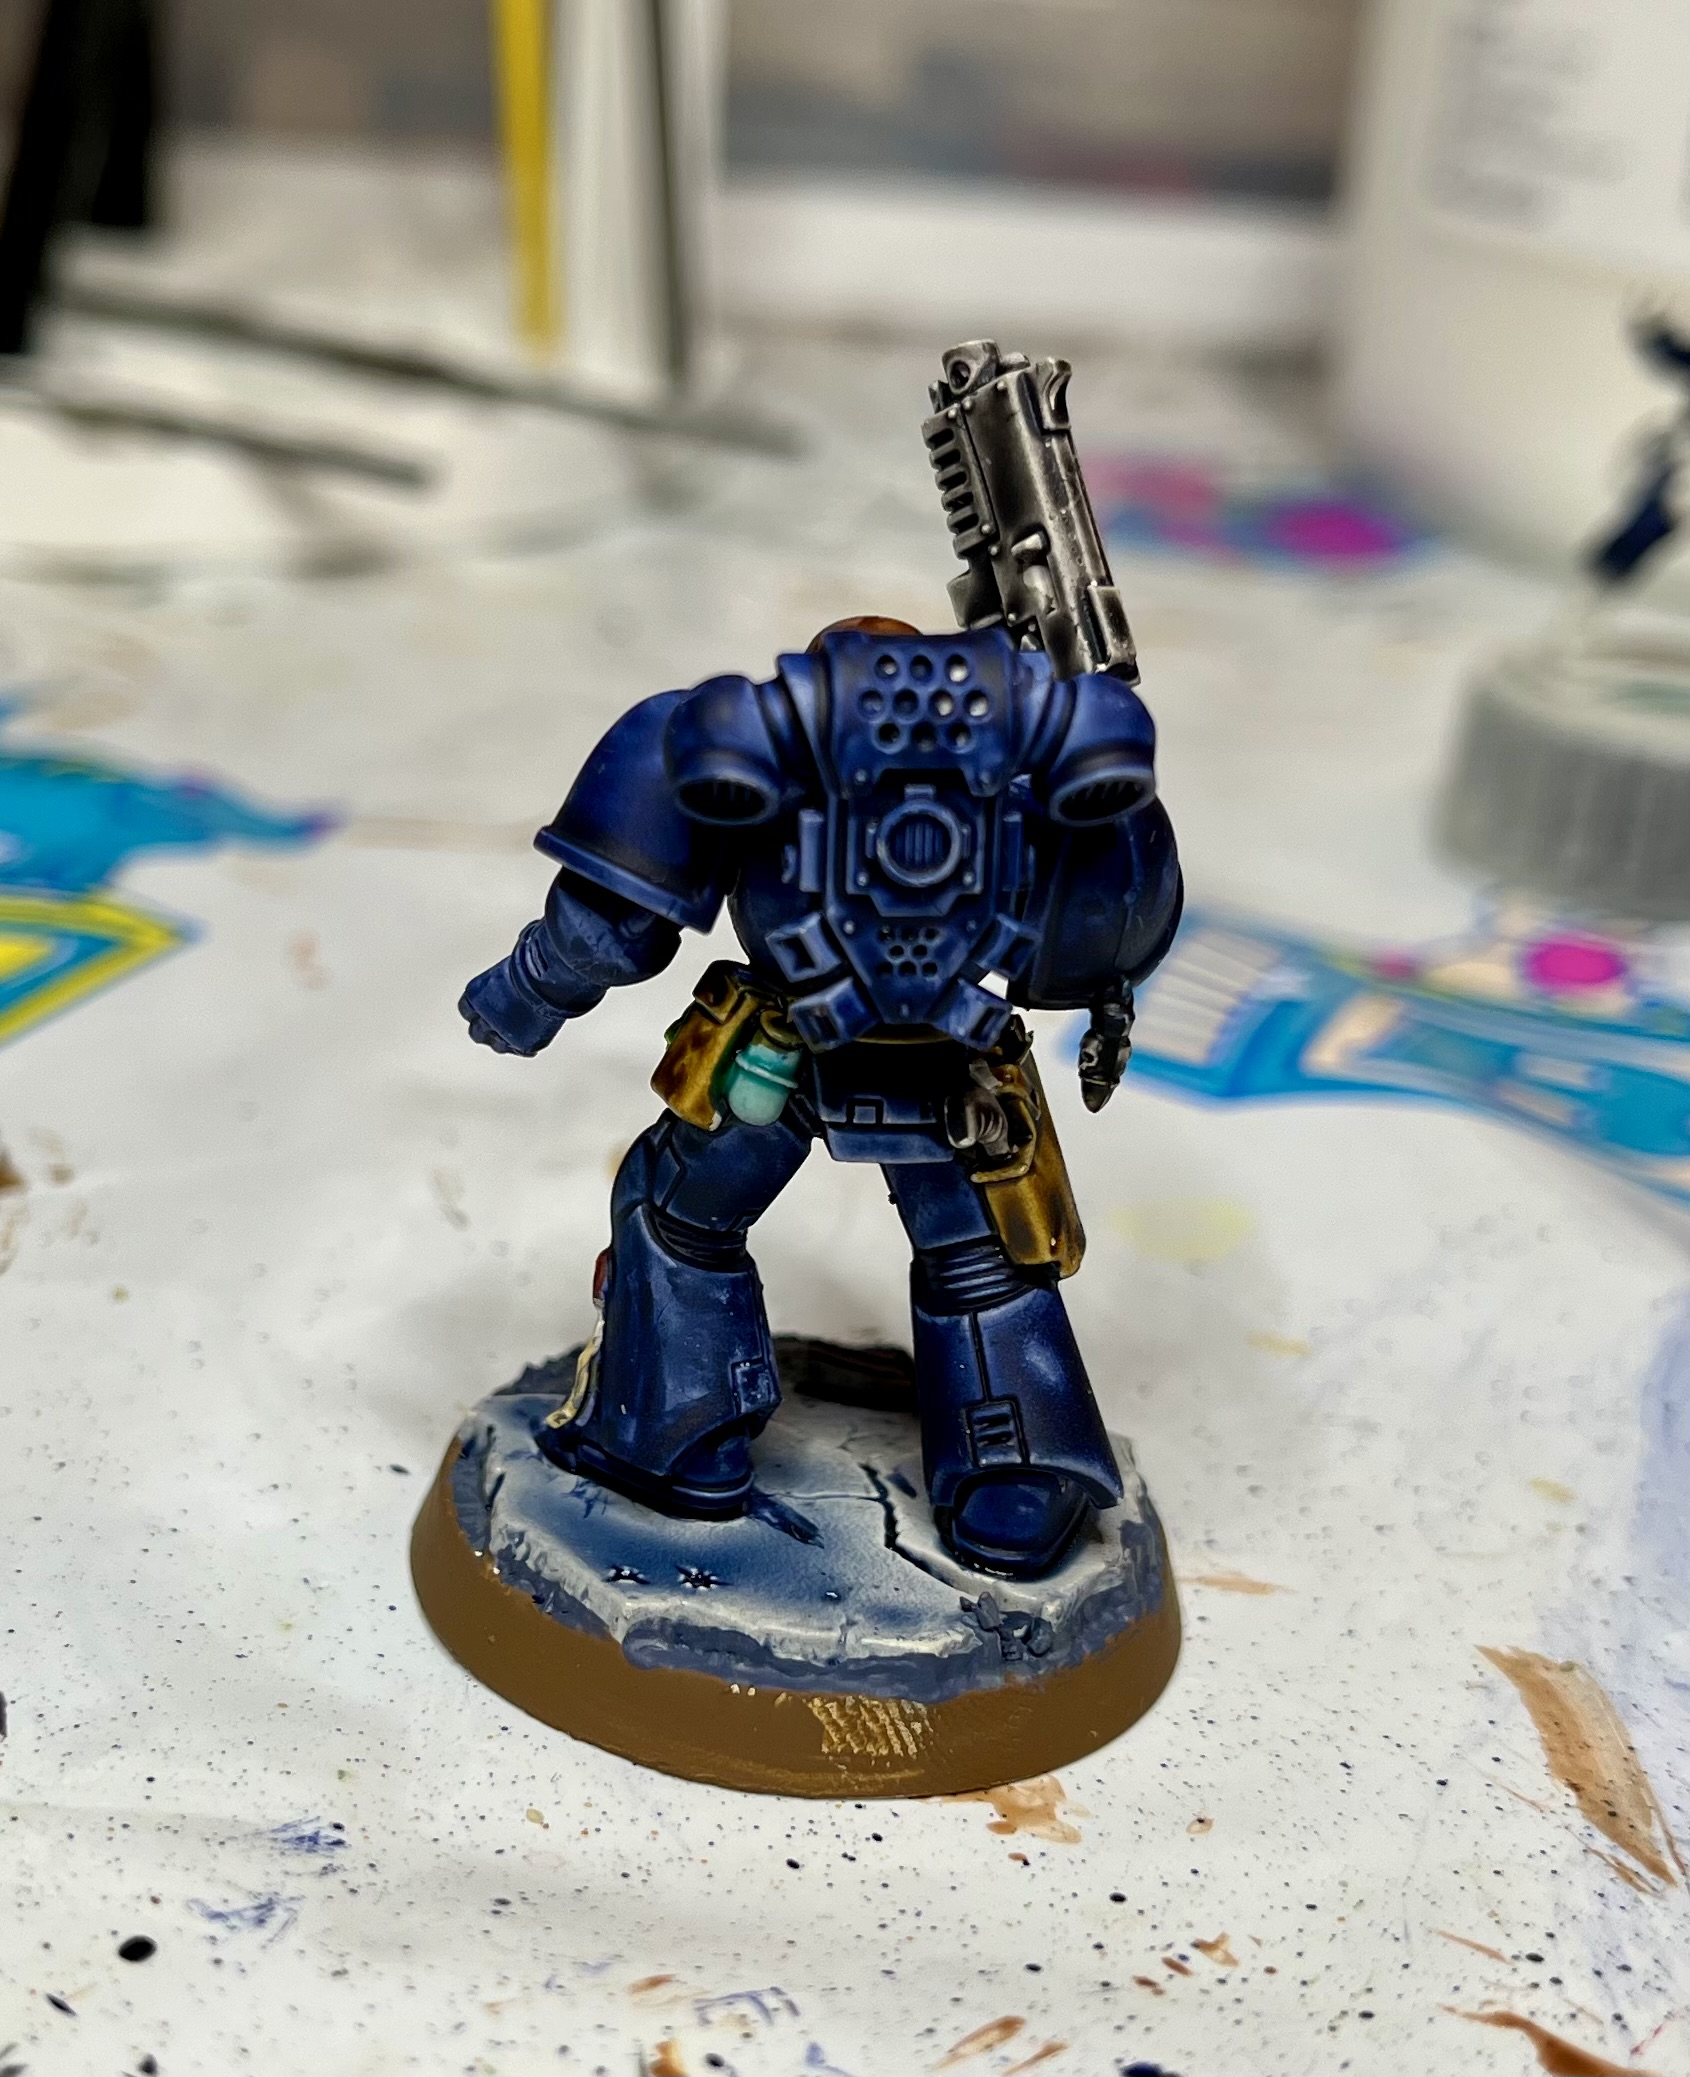


8. Last but not least Contrast paints can be shiny. To protect the paint and tone down the shine, I use a clear matte spray to finish it up.


Ta Dah!


Slowly but surely my Armored Infantry is getting ready for Xenos Rampant.

Thursday, April 10, 2025

Ogre: The Ogre Mark V


In the year 2085, armored warfare is faster and deadlier than ever. Hovercraft, tanks, and infantry slug it out with tactical nukes. But, the most feared weapon of all needs no human guidance. It's a giant cybernetic tank bristling with guns and missiles.

It's the Ogre.


A part of the sturdy, cardboard game board. You can also play without the board and use a ruler.

Ogre has always been one of my favorite games and one of the first games I purchased myself as a you 12 something. The updated board game version is fantastic and Honorable Son #3 (The Chemical Engineer Aviator) has plastic miniatures to play on the new board game. He asked me if I would paint them (it didn't take long to twist my arm) so I thought I would use just three GW Contrast paints to knock them out quickly.


Above is the sprue for the MK V Ogre in hard plastic. In order to use GW Contrast paints the items must be primed in either white or a light gray. I did not use Hobby Primers, even though they are usually the best quality primer out there - I just buy whatever is on sale.


You can see that some of the red can still be seen after one coat of primer. I almost gave it a second coat but I thought to my self, "Self, this is an Ogre. It's not some fancy parade ground museum piece. It needs to look rough around the edges." In addition, I was painting it white so I figured - who cares?


I did some rushing in gluing the Ogre together with the treads. I should have glued one side, let it dry, and then glue the other side. You can see the results of where my sticky fingers were as I put treads back into the correct positions. Hey, it's battle damage. The model itself is easy to put together if you take your time.


I used GW Contrast Blood Angel Red for the base color of the hull. Truth in advertising time: I did not paint the whole hull at one time due to the length of the model. Contrast paints take about 20 minutes to dry and I did not want my finger prints (see above on gluing treads!) on any of the areas. The main batteries, in fact all of the batteries are painted with Contrast Basilicanum (What the heck is a Basilicanum in the GW world? Gee, another homework assignment.) Black and the Primary Sensor Array is painted with Contrast Nazdreg (BWAH HAH HAH!) Yellow.


The engine like structures, exhaust fans, and treads were all painted with GW Contrast Black.


The rest of the secondary batteries, anti-personnel batteries and secondary sensor arrays were also all painted Contrast Basilicanum Black. The Rattler Missiles were painted with Contrast Nazdreg Yellow.


Tah Dah! All done.


BWAH HAH HAH!