
I finished the base of the 4th Swiss last night and they are now ready to march from their depot and head to the Peninsular for the glory of the Emperor of France!


 I'm a retired Colonel of Infantry (Regulars by God!) and Military Historian who likes to play with toy soldiers. I've been married to the love of my life since 1986, I have 5 honorable sons (my geeks in training), 4 daughters-in-law, al2 grandsons, 1 granddaughter, 1 dog and a gazillion miniatures.
Hobbies include . . . wait for it . . . Toy Soldiers, Reading, Wargaming, Reading about Toy Soldiers, History, Reading about Wargaming, Gardening, Reading about History and Reading.
I'm a retired Colonel of Infantry (Regulars by God!) and Military Historian who likes to play with toy soldiers. I've been married to the love of my life since 1986, I have 5 honorable sons (my geeks in training), 4 daughters-in-law, al2 grandsons, 1 granddaughter, 1 dog and a gazillion miniatures.
Hobbies include . . . wait for it . . . Toy Soldiers, Reading, Wargaming, Reading about Toy Soldiers, History, Reading about Wargaming, Gardening, Reading about History and Reading.
Markgraf Ludwig Wilhelm von Baden-Baden AC
Left (Infantry) Wing, 1st Line. Feldzugmeister Graf K. E. von Furstenberg-Mosskirch DC Exhaustion=5
Left (Infantry) Wing, 2nd Line. Feldmarschallleutnant Graf P. von Furstenberg-Stuhlingen DC Exhaustion=4
Centre (Reserve) Column. Feldmarschalleutnant Graf Arco DC and Feldmarschalleutnant Graf Erffa DC Exhaustion=4
Right (Cavalry) Wing, 1st Line. Feldmarschalleutnant Furst von Hohenzollern DC Exhaustion=3
Right (Cavalry) Wing, 2nd Line. Feldmarschalleutnant Baron von Stauffenberg DC Exhaustion=3
Detached Garrisons
Lt Genl Marquis de Villars AC
Detached Garrisons
Left (Cavalry) Wing, 1st Line. Genl Comte de Magnac DC Exhaustion=4
Left (Cavalry) Wing, 2nd Line. Lt Genl Marquis de Merde-Tete DC Exhaustion=4
Centre (Reserve) Column. Colonel le Comte de Robecq DC Exhaustion=3
Right (Infantry) Wing, 1st Line. Lt Genl des Bordes DC Exhaustion=7
Right (Infantry) Wing, 2nd Line. Lt Genl a Plombe DC Exhaustion=7

 A better look at the Austrian deployment with the French at the top of the picture. The French are virtually a mirror deployment of the Austrians: Infantry on the right flank, artillery and reserve in the center with the cavalry on the right.
 For both sides, the units behind the field works cannot move.
 The French Infantry getting ready to step out.
 The French guns are not pointing the wrong way; that's how we show which guns are limbered. I have some horses and limbers from Editions Brokaw that I need to paint for limber markers.
 The steady ranks of the Imperial infantry. I really need to finish the flocking on the bases!
 The Imperial Cavalry.
 The French Attack commences.
I'm a retired Colonel of Infantry (Regulars by God!) and Military Historian who likes to play with toy soldiers. I've been married to the love of my life since 1986, I have 5 honorable sons (my geeks in training), 4 daughters-in-law, al2 grandsons, 1 granddaughter, 1 dog and a gazillion miniatures.
Hobbies include . . . wait for it . . . Toy Soldiers, Reading, Wargaming, Reading about Toy Soldiers, History, Reading about Wargaming, Gardening, Reading about History and Reading.
The French Attack commences.
I'm a retired Colonel of Infantry (Regulars by God!) and Military Historian who likes to play with toy soldiers. I've been married to the love of my life since 1986, I have 5 honorable sons (my geeks in training), 4 daughters-in-law, al2 grandsons, 1 granddaughter, 1 dog and a gazillion miniatures.
Hobbies include . . . wait for it . . . Toy Soldiers, Reading, Wargaming, Reading about Toy Soldiers, History, Reading about Wargaming, Gardening, Reading about History and Reading.


 I'm a retired Colonel of Infantry (Regulars by God!) and Military Historian who likes to play with toy soldiers. I've been married to the love of my life since 1986, I have 5 honorable sons (my geeks in training), 4 daughters-in-law, al2 grandsons, 1 granddaughter, 1 dog and a gazillion miniatures.
Hobbies include . . . wait for it . . . Toy Soldiers, Reading, Wargaming, Reading about Toy Soldiers, History, Reading about Wargaming, Gardening, Reading about History and Reading.
I'm a retired Colonel of Infantry (Regulars by God!) and Military Historian who likes to play with toy soldiers. I've been married to the love of my life since 1986, I have 5 honorable sons (my geeks in training), 4 daughters-in-law, al2 grandsons, 1 granddaughter, 1 dog and a gazillion miniatures.
Hobbies include . . . wait for it . . . Toy Soldiers, Reading, Wargaming, Reading about Toy Soldiers, History, Reading about Wargaming, Gardening, Reading about History and Reading.
 Based on figures already painted and figures waiting to be painted, I finally organized my "generic" French Peninsular Army for Volley and Bayonet. For the Napoleonic period in Volley and Bayonet, units usually represent brigades and the skirmish stands are battalion sized detachments. The units listed are what the figures are painted as or will be painted, not just that unit. The actual brigade would have several regiments or combination of battalions.
 Soult Army Command Stand
 Ney Corps Command Stand
 12th Legere
 2nd Hussars
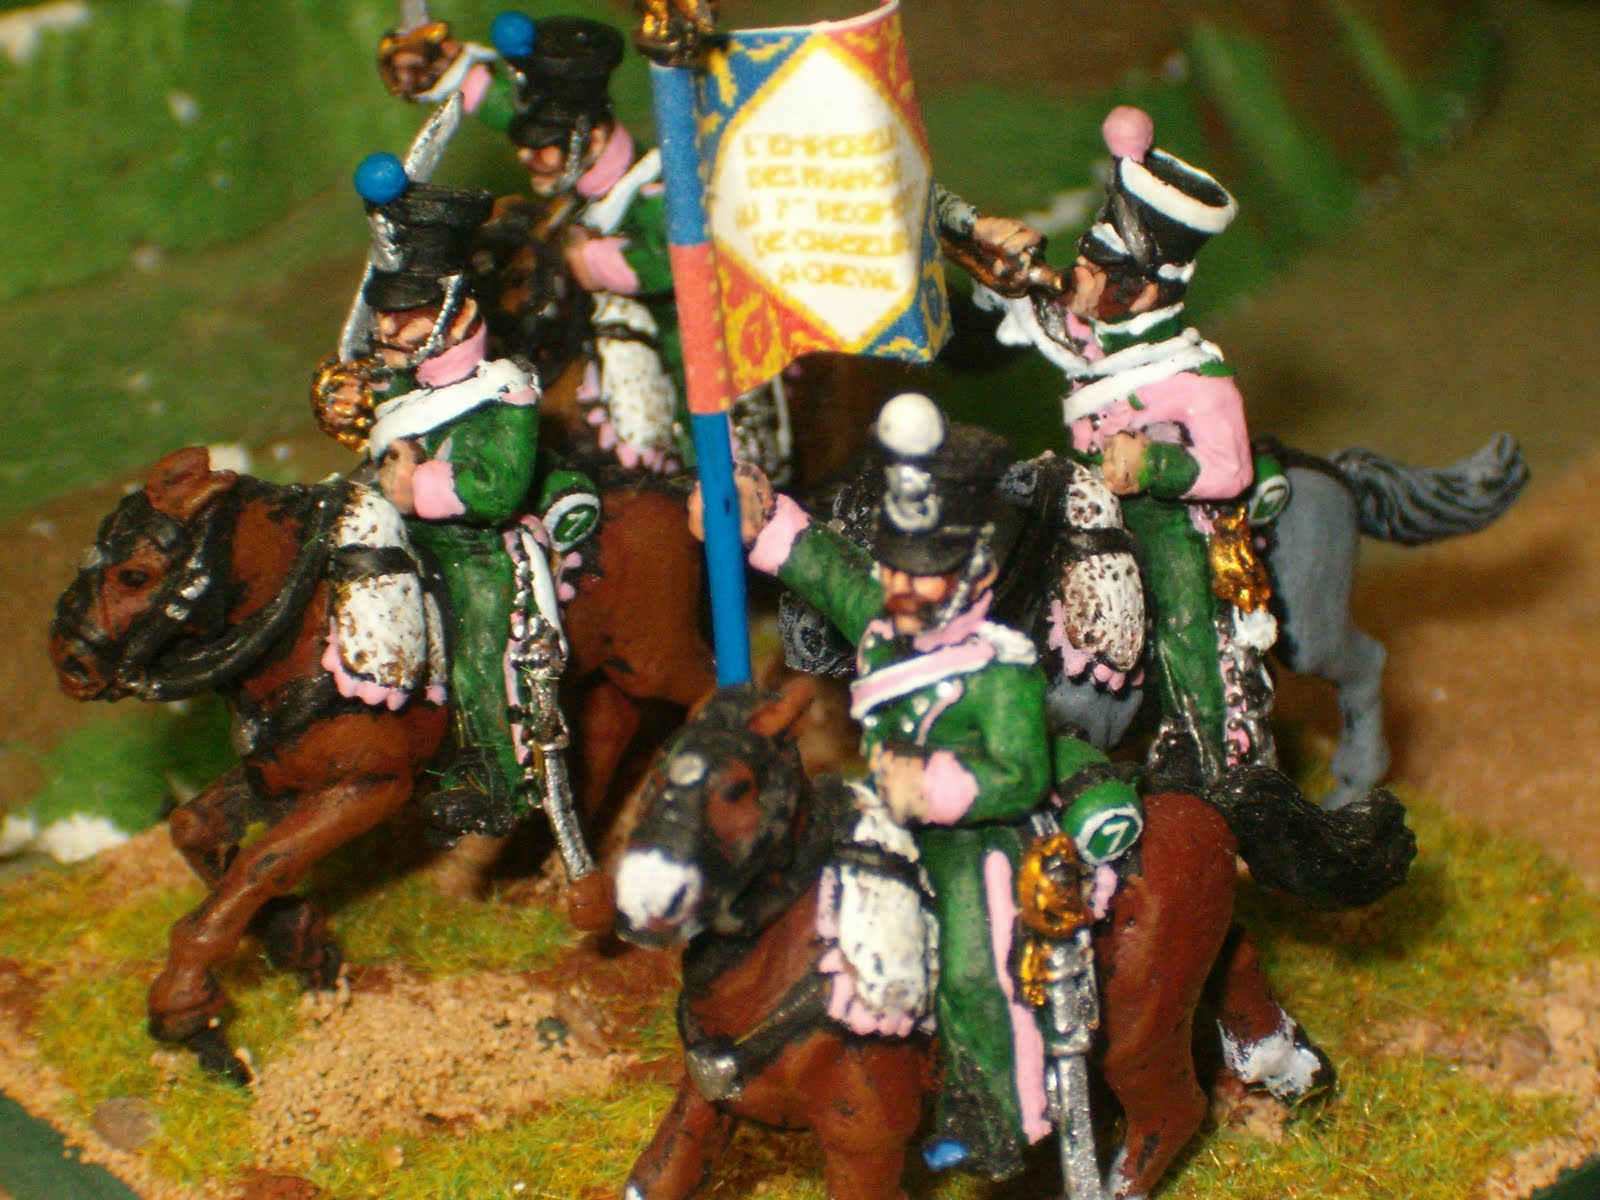 7th Chasseurs
 Grenadiers of the Old Guard
 Chasseurs of the Old Guard
I'm a retired Colonel of Infantry (Regulars by God!) and Military Historian who likes to play with toy soldiers. I've been married to the love of my life since 1986, I have 5 honorable sons (my geeks in training), 4 daughters-in-law, al2 grandsons, 1 granddaughter, 1 dog and a gazillion miniatures.
Hobbies include . . . wait for it . . . Toy Soldiers, Reading, Wargaming, Reading about Toy Soldiers, History, Reading about Wargaming, Gardening, Reading about History and Reading.
Chasseurs of the Old Guard
I'm a retired Colonel of Infantry (Regulars by God!) and Military Historian who likes to play with toy soldiers. I've been married to the love of my life since 1986, I have 5 honorable sons (my geeks in training), 4 daughters-in-law, al2 grandsons, 1 granddaughter, 1 dog and a gazillion miniatures.
Hobbies include . . . wait for it . . . Toy Soldiers, Reading, Wargaming, Reading about Toy Soldiers, History, Reading about Wargaming, Gardening, Reading about History and Reading.