As an Amazon Associate I earn from qualifying purchases

Monday, September 26, 2011

Warning Order Online Magazine

I keep forgetting to post this. From the Warning Order website:

Warning Order is the official online magazine of the WFHGS wargaming club. It is a free, full color online publication that can be downloaded in PDF format simply by clicking on the issue icons.

Each issue has reviews, battle reports, interviews, acenarios, and commentary, along with pictures of some of our recent games. Warning Order is published three times a year on an irregular schedule! Once enough material is reached to generate at least a 12 page issue, then it's generally put online.

This is a great resource for Wargaming and extremely well done!

Saturday, September 24, 2011

Raid in the Rittermark - Part 2

As mentioned earlier, I designed a scenario to introduce Games Workshops' Lord of the Rings Strategy Battle Game to my friend Michael Fox, creator of the great Dog Fight: Starship Tactical Card Game. The outcome of the play test was decidedly in favor of the Forces of Evil (BWAH HA HA!). After looking at the force composition and the rules I determined that that the Good side was undermanned - big time. So it was time to tweak the forces.

For the Forces of Evil
(BWAH HA HA!) I took away the 6 Uruk-hai archers and replaced them with an Orc Captain, Orc banner bearer, 2 Orc archers, 2 Orcs with spears and 2 Orcs with hand weapons. That would reduce the quality of the overall force (the Uruk-hai are tough) but still keep the numbers about the same. By adding the Orc Captain that gives another "hero" for the minions of the Dark Lord and the extra banner increases the Orc's chances of winning individual battles - plus I like flags. Which figure wins an individual fight is a simple process in this game: you roll an amount of dice based on the number of attacks you have and the high roll wins. If your figure is within 3 inches of your banner, you can re-roll one of your die. Whichever figure wins the fight can now attempt to wound the loser.

Heroes in this game can also spend predetermined "might" points to influence the dice. A hero in the game can avoid being wounded by spending "fate", tend to have more attacks (better chance to win the fight) and can alter the order of the game by declaring heroic movements, shooting or fights. I like how heroes are treated in this game. Let's face it, what would a Lord of the Ring game be without heroes?

To beef up the good guys, I decided on adding a "what if" to the background of the scenario. What if some good ole Dwarves had a mine or workshop in or near the Rittermark? What if I had some Dwarves in my figure cabinet that haven't seen the light of a gaming table in years? Enter the tough short guys. How tough? Ever try to work in a mine with a Balrog around? These guys aren't like those sissy Dwarves from Snow White.
Ever try to work in a mine with a Balrog around? To help out the Riders of Rohan I added a Dwarf captain, a Dwarf banner and 10 Dwarf Khazad Guard (the best of the best with honors!)

The Dwarf starting lineup.

The game objectives will be the same as the previous game. The Forces of Evil (BWAH HA HA!) need to get 1/3 of their forces off the northeast corner of the table near the farmhouse. For infantry to cross the river, there is still one ford and of course the bridge. Cavalry and Tom the Troll can cross the river anywhere counting as rough terrain. The Forces of Evil (BWAH HA HA!) start in the southwest corner and the good guys set-up on the eastern side of the board. I decided to put the Citadel guard force of archers behind the stonewalls, the Dwarves to the south of the bridge amongst the ruins and the Riders of Rohan on their left flank ready to ride down the enemy.


I forgot to mention in the previous posting that the game mat is from Hotz Artworks and is their 6' x 4' European Fields pattern.


Michael getting ready to deploy his evil minions.

The game started with the bad guys moving quickly to secure the ford. I responded cleverly by sounding the trumpets, advancing the Riders - and forgetting for 2 turns to move the Citadel Guard forward to cover the ford with arrows. Yep, very clever of me.

The evil horde moves out. . .


. . . while the pride of Rohan advances.

Michael was able to get his orcs across the ford followed by Tom the Troll. As I looked at the situation I realized I was in trouble with Michael's orcs already on the northern side of the river with the Uruk's soon to follow. In addition, the Dwarves move 5" while the Uruks, Orcs and men on foot can move 6".

"Where are the rest of the Dwarves? That's right, cavalry moves 10" and a Dwarf moves 5".

Instead of all of my cavalry charging the Uruk-hai, I decided to detach 3 of the Riders to cross the river as a forlorn hope to engage the orcs and Tom the Troll in a attempt to slow them down.


You can just see the 3 Riders in the background that were detached in an attempt to slow down the Orcs.

At the same time, I would send 1/2 of the Dwarves back to the bridge and cross it to reinforce the Citadel Guard. Fortunately for me, while I was worrying about the Orcs north of the river, Michael was worried about the sight of mass cavalry bearing down on him and he decided to keep the Uruk-hai in place to protect the ford.


The Dwarf force that is moving over the bridge to help strengthen the right flank.

The next couple moves is what this game is all about. Heroic charges and fights. In the melees to follow, I was able to keep my cavalry charging and initiating the combats which gives cavalry an extra attack die.


I was also able to use my hero Eomer and perform heroic movements; not only did it allow him to move first but also all Riders within 3" of him to move when he bellowed, "Follow Me!"


My forlorn hope arrived in time but I did not have faith that they would survive long. Tom the Troll was delayed a little when he decided to stop, pick up a rock and through it at one of the riders. Fortunately he missed this time.


The Forlon Hope engages the Orcs.

To make a long story short, the Citadel Guard got in range just in time and their archery skills took Tom the Troll out of the game - while the 3 riders killed a few Orcs.


A few less Orcs and Tom the Troll is killed by mass archery fire.

Meanwhile south of the river in a ferocious fight the combat went back and forth with casualties on both sides. In a subsequent turn Eomer declared a heroic combat allowing him to fight the 3 Uruk-hai he charged. Eomer decided to put the "H" in Hero and slew all 3 Uruks-hai dramatically changing the situation. As the Uruk-hai started to take more casualties, the Dwarves caught up and also engaged the foe.

Eomer (on the white horse) about to show the Uruk-hai that he is the stuff of legends.

As the Uruk-hai started to take more casualties, the Dwarves caught up and also engaged the foe. Slowly but inevitably, the Uruks and Orcs were thinned out and it became obvious that the evil side would not have enough forces left to win.


What a fun game that was actually a lot closer than I made it sound (hey - it's my blog!) Seriously, this game could have gone either way; both forces were evenly matched and both of us played a good game. The turning point in the game was the loss of the 3 Uruks killed by Eomer and the death of Tom the Troll. I'm looking forward to the rematch!

Beregund and Gumdrop the Dwarf celebrate the victory.

Tuesday, September 13, 2011

Raid in the Rittermark - Part 1

What a great Labor Day weekend: Texas Hold'em with the men of my sheparding group from church and two miniature wargames in the world of Middle Earth. Yeah . . . real man stuff.

For the miniature wargaming part of the weekend holiday, I designed a scenario for Games Workshops's Lord of The Rings Strategy Battle Game. (I know I'm beating a dead horse, but it's not really a strategy game - but it is a fun skirmish game). Since I was going to be introducing the game to my friend Michael Fox (creator of the great game Dogfight: Starship Edition) I thought it might be a good idea to play test the scenario.

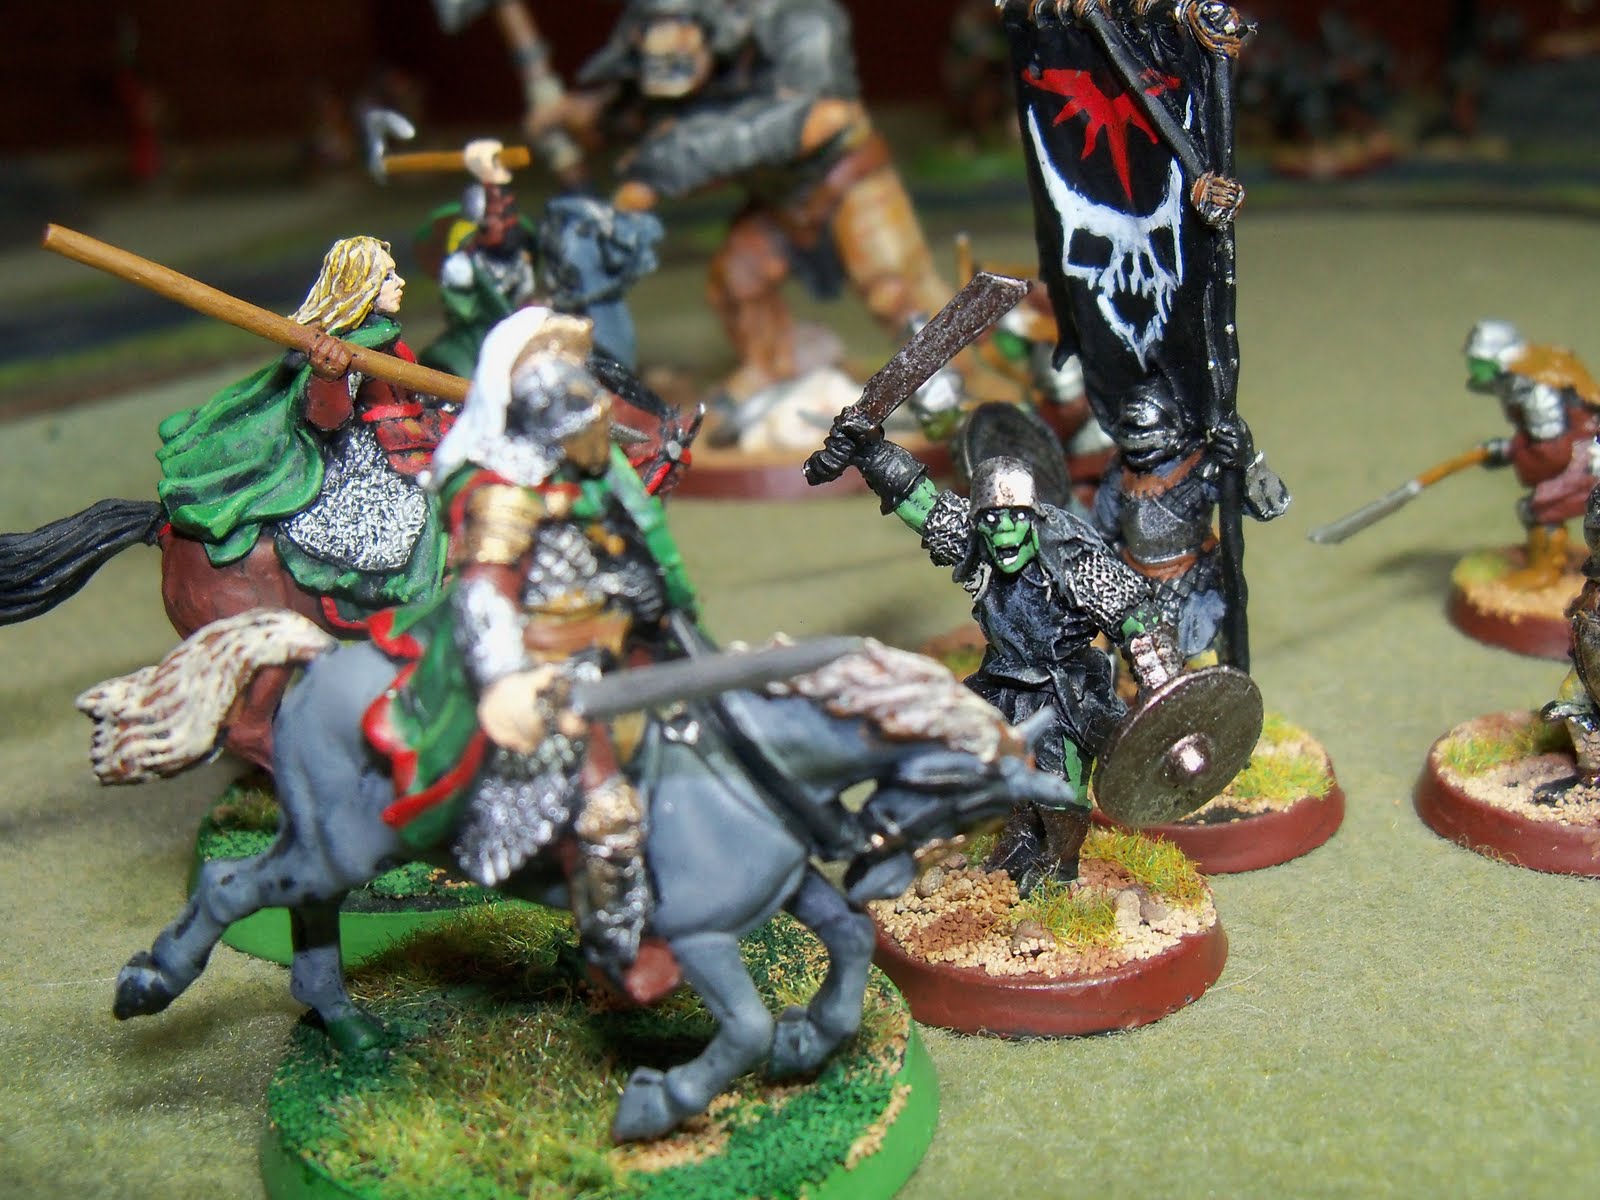
The scenario is based on one of the nameless fights mentioned in The Two Towers involving bands of Saruman's orcs and Uruk-hai being granted "free passage" through Rohan by Grima Wormtongue. Eomer, being a manly kind of man, does not take kindly to these incursions and is attempting to destroy one of the raiding parties.

Eomer and Banner Bearer.

The Forces of Evil (BWAH HA HA!) enter from the southeast corner and must get 1/3 of their forces off the board near the farmstead in the northwest corner.
The southern part of the game area. The Forces of Evil (BWAH HA HA!) start in the right hand corner with the small hill as their deployment limit. The river can only be crossed by infantry at the ford (hard to see in this photo but just north between the two hills in the south) and at the bridge. Cavalry and Trolls can cross the river anywhere and for game purposes it is treated as rough terrain.

The northern end of the gaming area. The Forces of Evil (BWAH HA HA!) exit point is to the right of the cottage.

The river, bridge and hills come from Battlefront's Battlefield in a Box range designed by one of their subsidiary companies, Gale Force Nine. The river box set comes with two bridges; one a stone bridge and one built of timber. I have used both bridges in 15mm and 25mm games ranging from the Late Roman period all the way through World War II. The stone walls are from Games Workshop as is the statue and ruins near the bridge. The house is a card stock model that came with an earlier edition of the Warhammer game box.

The Forces of Evil (
BWAH HA HA!) were to be all Uruk-hai with one Mordor Troll: Lurtz (Uruk-hai captain), 1 Uruk-hai with banner, 8 Uruk-hai warriors, 6 Uruk-hai archers, 6 Uruk-hai crossbowmen and one Mordor Troll.


Uruk-hai with crossbows. They can't move and shoot; but when they hit, they hit hard!

The brave defenders of Rohan will have Eomer, 1 Rider of Rohan with Banner, 9 Riders of Rohan on horse, Beregond (Citadel Guard hero with longbow), 1 Citadel Guard with banner and 6 Citadel Guard with longbows.

Beregund of the Citadel Guard and his Banner bearer.


It became evident during the first game, that the Citadel Guard needed to go back to the archery range and practice.

The Forces of Evil (BWAH HA HA!) were under the command of Honorable Son #5 and his friend Charlton. The Rohirim were led by Charlton's dad and his brother Lawrence.

Lurtz and his boys in their stylish Bad boy black on black uniforms.

And I was the umpire.

The umpire looking very chic in his helmet and superhero jammies. Yep, no questioning his rulings during the game!

During the game the Riders of Rohan depended heavily on their mounted archers which did little to slow down the Uruks. They did get one effective mounted charge in but were soon surrounded and put in a world of hurt by the Uruks.

Eomer never did really get into the fight; heroes are important in this game especially if you are the Forces of Good and are outnumbered. The Citadel Guard needed to go back to the archery range for practice. And frankly Tom the Troll was . . . well, Tom the Troll. Dang he's tough. And he can throw rocks. Big rocks. Good guys go splat under the rocks. Honorable Son #5 did a good job with his missile troops, both archers and crossbows, but it was the hand to hand combat capability of the heavily armored Uruks that made the difference.

You know how this combat is going to end . . . and it won't be pretty.


An overwhelming victory for
the Forces of Evil (BWAH HA HA!). Hmmmm . . . maybe a bit too overwhelming as the good guys really got stomped quickly (Like a hot knife through butter). Time to modify and play balance the scenario before Michael plays . . .

Where were the Three Musketeers when we needed them?

Monday, September 12, 2011

One More Favorite Warhammer Figure

How could I forget the Templar Grand Master of The Knights Panther?


Sunday, September 11, 2011

Favorite Figures - Some more Warhammer Empire

Just as a reminder - I like flags. Here are some more Warhammer Empire Figures featuring flags:


These figures can be assembled from the hard plastic, multi-part kit Empire State Troops. The box currently comes with 10 figures and only enough parts to make one standard bearer. As with all Games Workshop kits, there are quite of few options for heads, weapons, etc., to make the figures unique.


The flags are based on regiments from the Kingdom of Bavaria from the period of the War of Spanish Succession in the early 1700's.


Arrghh! Well, September 19th is National Talk like a Pirate Day.

The animation on this figure looks relaxed, yet dangerous.


I like the large pistol resting on his shoulder. Just don't stand behind him (safety violation) as it is not pointed up and down range.


This is the Empire Griffon Standard Bearer. Griffon heraldry appears to be popular in the Empire; just like the Nike swoosh in our culture. Currently this figure is not available in retail stores in the USA, but it can be ordered online or by phone.


Last but not least, though not flag bearers are two more figures.


Last but not least is a leader figure. Above and below is a "champion" (leader) of Empire State Troops. Personally, I think he looks pretty cool with a two-handed sword.

Saturday, September 10, 2011

Preview: Raid in the Rittermark

Just a quick preview of our latest game using GW's Lord of the Rings Strategy Battle Game.


Monday, September 5, 2011

Favorite Figures - The Imperial Guard, Part 3

Now for the troops! The figures are from GW's Imperial Guard Cadian (Cadia is one of the planets) Kasrkin range. I can't remember why they are called Kasrkins but they are equivalent to a Grenadier Company from the Horse and Musket era. The best of the best with honors - sir!!! For my unit, they are the 6th Infantry (Regulars By God!), the greatest infantry regiment in the known universe:

Want to guess my Regimental Affiliation?


Trooper with flamer; good area weapon and pretty nifty in restricted places. To get the "burn" look at the end of the barrel I used a black wash and flesh wash.


Here is the plasma gun - very effective against armored targets. I like how it looks like a BIG GUN and the figure was fun to paint.


This soldier is carrying a meltagun. I forget the difference in game terms between the plasma gun and the meltagun; but, it looks cool. Reminds me of the squad machinegun - he's the guy I turn to if I need to put down a lot fire in a hurry.


Watching the back of the plasma gunner is a soldier with laser rifle.


Soldier with laser rifle. Another reason I like this range of figures is that they carry their weapons realistically and look like they know how to use them!


Here is what the troops look like from the back.


Just another bug hunt. By the way, Starship Troopers is one of the best military science fiction books ever written. The movie is one of the worst ever made - Danger! Danger! Will Robinson!


Yes - I like the plasma gun.

One last look at the some of the men of the 6th Infantry of the future: