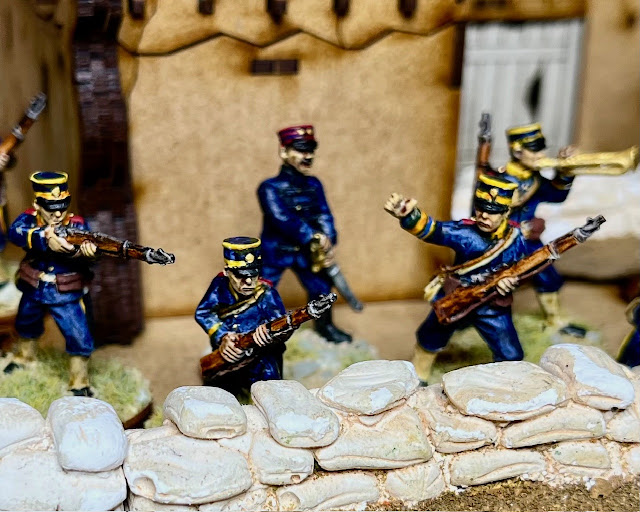
Whenever I start a new period or unit, I make sure I put how I painted the unit into my journal. Before I purchase figures, I first do my research and kinda/sorta figure out how I want the unit to look - then I purchase figures! As I started my Boxer Rebellion project, I decided to use the new Imperial Japanese Infantry from Crusader Miniatures. Always prime your figures as paint sticks to paint. Whether you use white, black, pink is up to you. If you use contrast type paints you will need to prime in white or light grey. For these figures I used Citadel Bone Wraith (not as dangerous as a Banshee) Grey for my primer.
Photograph of Japanese Infantry, Chinese Relief Expedition, 1900. Photograph by Captain C.F. O’Keefe, via National Archives, U.S. Naval Historical Command, and Library of Congress.
1. I started with a coat of Citadel Contrast (CC) Darkoath (BWAH HAH HAH!) Flesh and then painted the garters with CC Skeleton (no bones about it) Horde.
2. Let's talk about painting Japanese uniforms with the Infantry yellow branch color.
CC Darkoath (BWAH HAH HAH) Flesh, CC Skeleton (no bones about it) on the gaiters and CC Ultramarine (For the Emperor!) Blue on the cap.
3. The Japanese uniform was heavily influenced by the German Army at that time. For that color, I usually do a base of Vallejo Prussian Blue with highlights of Vallejo Dark Blue. I compared that with doing a heavy coat of Contrast Ultramarine (For the Emperor!) Blue and found I got almost the exact color for the uniform. I decided to go the speedy way and used Contrast Ultramarine (For the Emperor!) Blue. When I paint I like to do all of the same colors of a figure at the same time. Fortunately . . . I had painted a test figure and decided to do the cap as a separate step due to leaving where the Infantry branch color of yellow would go due to the challenges of painting yellow. The cap is the most challenging part with the yellow branch colors on dark blue.
4. I highlighted the skin with Vallejo Dark Flesh.
Japanese ranker painted with Contrast Ultramarine (For the Emperor!) Blue. Skin has been highlighted on the "high points" with Vallejo Dark Flesh.
Imperial Japanese Infantry NCO, circa 1895 to 1905 painted with Vallejo Prussian Blue and then highlighted with Vallejo Dark Blue.
6. I went back and painted or cleaned up any areas that would have yellow with white; the collar, the trim on the cap and the trouser pants.
The cap and the trouser stripe look great, but the excess paint on the collar looks reddish - I later fixed that with Vallejo Flat Yellow.
8. I'm not going to bore you with each step I did with the rest of the colors of the various parts of the figures. Most of us have our own preferred order for painting; I like to start with the faces and some of the best figures I have seen are painted with the faces last. They're your figures and we all have a way we like to do them. Anyway . . . here are the colors I used to complete the figures:
Cap straps, visors, bayonet scabbard and hair: Vallejo Flat Black.
Haversack and strap: CC Skeleton (no bones about it) Horde.
Metal: CC Basilicum (German for Basil) Grey.
Rifle, Canteen and strap: CC Gore Grunta (I don't even want to ask) Fur.
Straps, ammo pouches and rifle sling: Vallejo Mahogany Brown.
Bayonet: Vallejo Silver.
Boots: CC Templar (and we know what happened to them!) Black.
Epaulets: Vallejo Flat Red.
To replicate the Imperial Star on the cap, which unfortunately is not sculpted on the Crusader figures, I did a black dot with Vallejo Flat Black and then a dot of Vallejo Shiny Gold on top of that.
Tah Dah!


.jpeg)

Love Meiji Army uniforms. I've seen a few videos of the guy in the photo. He really has the reenactment gear down pat.
ReplyDeleteI’ll have to look for the videos.
Delete