As an Amazon Associate I earn from qualifying purchases

Showing posts with label Flags. Show all posts

Monday, October 13, 2025

The Boxer Rebellion Project, Part 20: Imperial Chinese Odds and Ends


 I had a few figures leftover from my Wargames Foundry order so I am not putting them to waste. First up is another artillery figure carrying an artillery round into a flag bearer. Chinese armies were known for having lots of flags in their units so the more flags the better.


Now that I am looking at the photos I need to do some touch-ups on the flag where I made the cuts. Next (posted in the previous blog) is another artillery figure that I made into an artillery lieutenant:


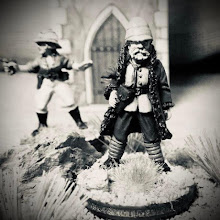
Speaking of artillery, I originally had the figure of the Imperial Chinese General Li Shimin from the Taiping Rebellion as the artillery officer for my gun holding a linstock. Since I purchased a Krupp breech loader, I have now made him into a banner bearer. His armor is outdated for this period - but so what? It looks cool. He will either go with a unit, be an objective marker, or just look neat on the tabletop.

Original role.

New Role.


Next up is another figure of General Li Shimin that maybe a leader, objective, etc. Th color and patterns are based on a uniform in a museum at the British Museum.


Phase 2 of the Boxer Rebellion poject is just about finished!


Sunday, October 5, 2025

The Boxer Rebellion Project, Part 17: Kansu Braves Command Pack from Crusader Miniatures


I'll be honest with you. When I first got the Kansu Braves command pack from Crusader Miniatures for my Imperial Chinese Field Force (yep, The Men Who Would be Kings!), I was not overall impressed. I looked at them and compared them to the excellent Japanese Infantry from Crusader and they just looked plain. Then I started painting - wow; I'm glad that the uniforms were plain once I researched and figured out how to paint the uniforms. Once painted they look colorful and ready to take on the Western Devils (and the Japanese).

Unpainted BKB004 - Kansu Brave Command Group picture from the Crusader Miniatures website.


The great thing about Chinese armies is that you can never have enough flags! The officer with revolver has an open hand so I added a banner which is also available from Crusader Miniatures. The flags for the Kansu Braves are described as primarily yellow and red.


Musician with tradition long horn.


The (Surprise) standard bearer.


I'm assuming this is an NCO or more correctly a leader of "10" or "100", etc. This is a really nice, dynamic figures.


Now it's time to finish the rank and file.

Monday, September 1, 2025

The Boxer Rebellion Project, Part 12: First Imperial Chinese Infantry Unit

Figures from Wargames Foundry.

HUZZAH! I have finished my first Infantry Unit for The Men Who Would be Kings (TMWWBK). As previously mentioned I'm basing my Imperial Chinese Field Force on the Imperial forces that faced the Second Relief Expedition led by General Sir Alfred Gaselee, GCB, GCIE.

Imperial Army lieuntenant with the Qing Dynasty Banner. Banner can be purchased from North Star Military Figures.


The recommend size for Regular and Irregular Infantry units in TMWWBK is 12 figures. I decided that the first unit would look more "traditional" with primarily the classic Manchu hat and uniforms.

Another banner bearer, the commanding officer and a drummer (duh!).

Uniforms are a bit more fancier than what I am used to painting and take more time - but it is well worth the effort.


They are ready to repel enemies internal and external.


Tuesday, July 15, 2025

The Boxer Rebellion Project, Part 7: We Need a Flag?


Hey! I made another flag. Yeah . . . about that.


I used the same technique that I did with the Austro-Hungarian Naval Ensign. I was, how would you say, sloppy on this flag. First of all, with the black fringe seen in many contemporary paintings it initially made the red on the flag look darker. Hey I will just lighten up the red! Ooops, I spilled the white paint.


Oh well, I guess it won't look too bad at gaming distance. Then I carefully folded the flag together with some white glue and yep, I forgot to pre-fold the flag before the glue. It did not match up at all. After some serious folding, and repainting the edge and trying to get the creases out . . . well you can see the result.

Then: Surprise! When I went to glue the wire staff to the figure I had forgotten to check the fit before I added the super glue. Of course I got super glue on my fingers and messed up the staff under the flag with super glue. That's what I get for not taking a deep breath and giving a day.

"Look Mom! No hands!"

Okay. Maybe I'll pretend it is battle damage. I paint for gaming distance, and at gaming distance it doesn't look too bad. I'll have to decide later if I'll use one of the excellent flags from Flags of War and get a staff from Tsuba Miniatures. Plus I'll file the palms of the hand!

Group shot! It doesn't look too bad at gaming distance.


Monday, July 7, 2025

The Boxer Rebellion Project, Part 6: We Need a Flag!

Naval Ensign of the Austrian-Hungarian Navy

I love flags! If I can get them on the Dining Room table (whether they were actually carried or not) I will get them on the table. Fortunately we have evidence that the Naval Ensign (flag) of the Austro-Hungarian ground contingent was carried by the sailors of the SMS Zenta and came from the ship. 

During its existence, Austria-Hungary did not have a common flag – a "national flag" could not exist since the Dual Monarchy consisted of two sovereign states. Until 1918, the War Fleet continued to carry the Austrian ensign it had used since 1786.

Naval ensign 1786–1918.

SMS Zenta in the Boxer Rebellion.

Instead of purchasing a commercial flag, this flag seemed easy to reproduce and paint. I wish I had taken pictures of what I did but I will try to summarize:

1. I used the image above as a guide and grabbed my handy-dandy rule and made a tricolor with an artists graphite pencil on regular printer paper. I did the right side of the flag first and then the left side with a small separation between them for the pole.

2. I sketched out the shield and crown sightly darker with my pencil

3. I mixed about 2/3 Vallejo Flat Red with 1/3 Vallejo Flat White and painted the red portions of the flag. As expected, I could see some of the crown through the paint of the upper portion of the flag.

4. I then used Citadel Yellow for the crown.

5. I went back to the red portions of the flag and painted them again (carefully) with Citadel Contrast Blood Angels Red.

6. After the contrast paint dried, I went back and cleaned up the crowns with the yellow and then added some red dots on the crown.


Note: I made the flag smaller than in real life.

7. Ta-Dah!