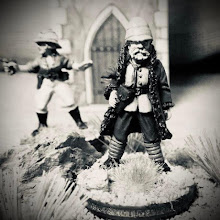
The idea of painting highlanders of any period daunts many a hobbyist and forces them to stop the urge of wetting their pants. I have painting highlanders in the following periods over the last 43 years: The English Civil War, The Jacobite Rebellion of '43, the American Revolution, the Napoleonic Wars and the Colonial Periods. I have tried many techniques and I'm going to pass on the technique I currently use.
First up, The Colonel's rules (you don't have to use them, they are merely suggestions!) of painting:
Step 1. Prime the figure. It does not matter what color you use; whether it is black, white, grey or brown - but I would avoid the hot pink. The overwhelming majority of the time I use black mainly because it helps with shading and hides most of the mistakes I make. I do not buy an expensive can of primer. I use the 98 cents can of Flat Black Primer from Home Depot. After the primer is dry, I paint the flesh first. I used Vallejo Dark Flesh. (Unless specifically mentioned, all the paints are Vallejo.)
Step 2. I then thin some GW Flesh Wash that I bought in Germany in 1998. I have no idea what it is called now. I apply the wash on the flesh so it flows into the deep recesses of the flesh to give a shading effect.
Step 4. I have no idea why I painted the white stockings at this point but I did using Flat White. I usually try to do all of one color at one time if practical; I also try to work from the "inside" to the outside.
Step 5. I suddenly realized I had no idea what the Grenadier mitre caps looked like. While the white was drying Mr. Google helped me out and I painted red parts Flat Red.
Step 6. I painted the bonnet Dark Prussian blue and the band and touri (the little ball on top) Flat Red.
Step 7. Since the red was out, I painted the short highland jackets Flat Red. With one coat you can see how the black primer is helping with the shading but I did have to go back on some figures and add a second coat in select areas.
Step 8. I did the grenadier jackets at the same time and then kinda/sorta dried brushed the plate on the mitre cap with Flat White. With my eyes at this age, there was no way I was going to try and get the pattern exact; but it looks excellent at "gaming" distance.
Step 9. I painted the base of the kilt Dark Army Green.
Step 10. Time for some lace and the bag with Flat White, facing colors with Green Ochre, black leather with Flat Black and the buckle with Shiny Gold.
Step 11. I painted a light second coat of the kilt (well, really painted over as a light second coat) Flat Green.
Next: Details and finishing the kilt (it's not that hard!).


