As I mentioned in Part 1, I have become a big fan of Perry Miniatures Hard Plastic Afghan Tribesmen over the last year and wanted to pass on some tips that I have learned now that I am starting my second box. Now these are only the "tips" and "techniques" that I use and learned while putting together the miniatures - don't feel you have to do it my way. This is what works for me and I have had fun! Since with many of my forces for The Men Who Would be Kings are mounted "3", "2", "1", this allows an opportunity to create vignettes to add some uniqueness to your forces. And don't forgot the individually mounted figures can look great too!
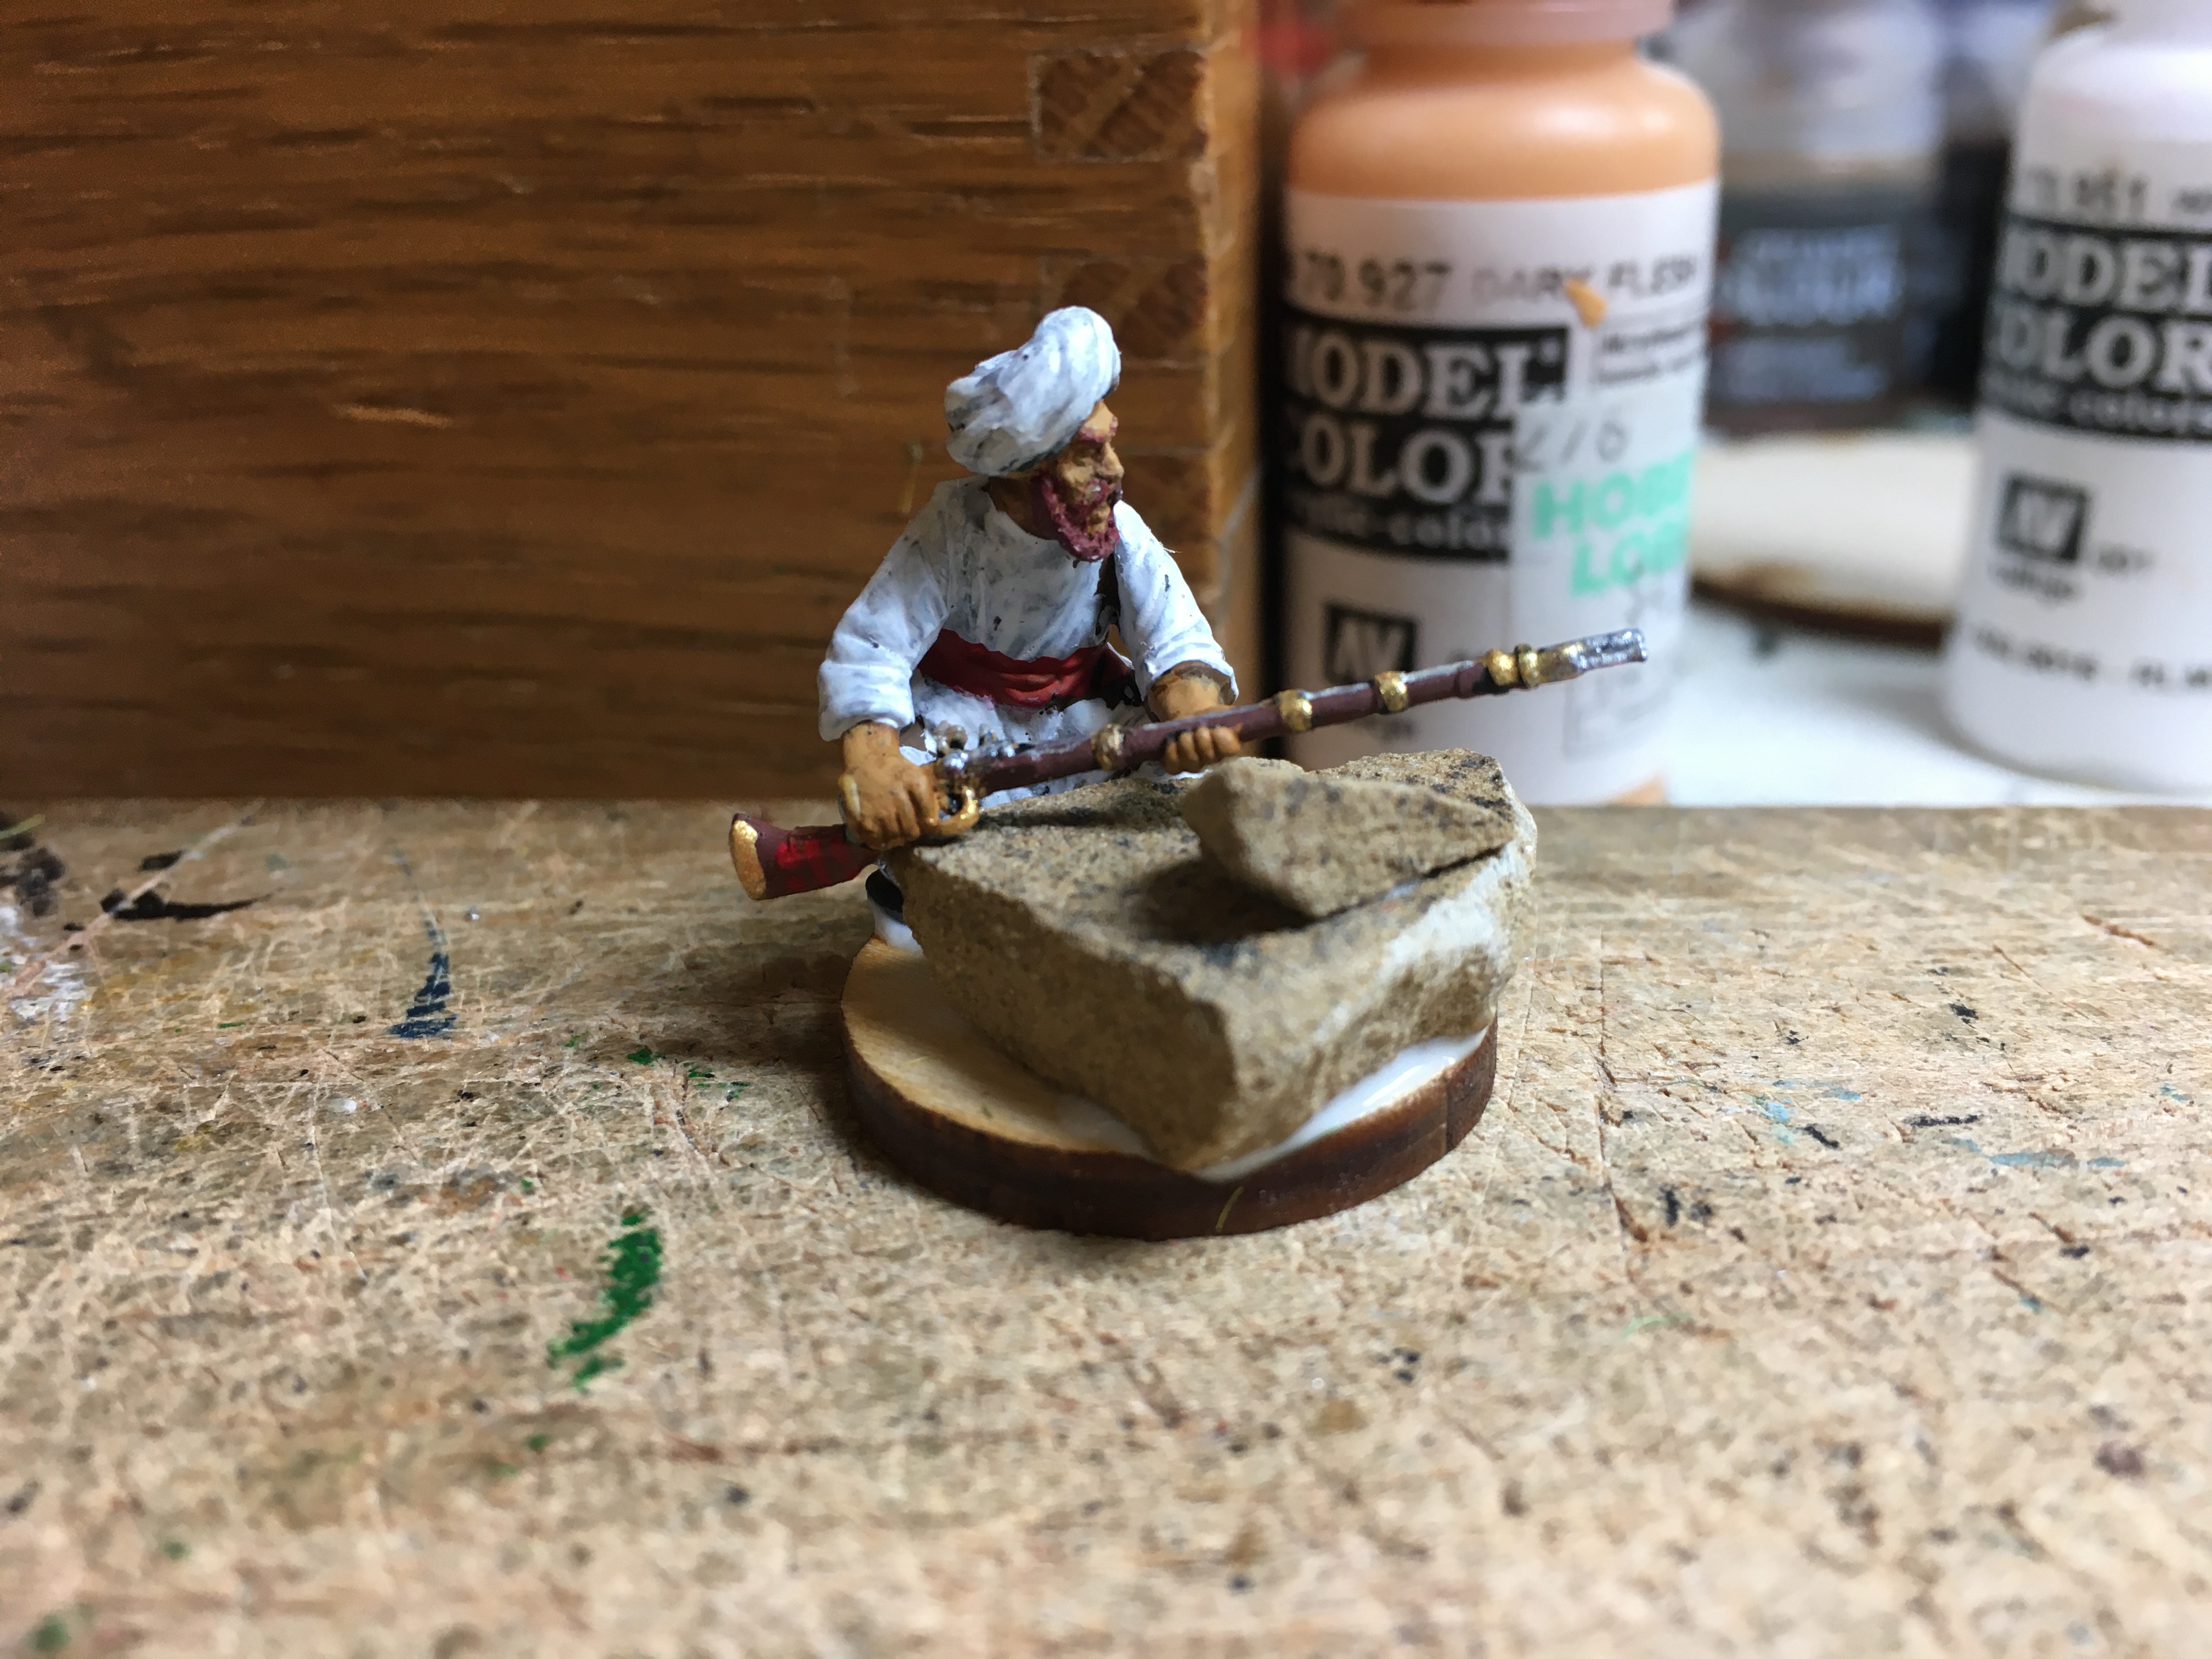
Here is an example of an individual "vignette" I wanted to do based on a photograph I had seen which I now can't locate! Anyway . . . I wanted to have a crouching Pashtun looking like a sentry or outlook to add some character to one of my Irregular Infantry units for The Men Who Would be Kings. I simply took one of the crouching bodies, picked a head I liked and turned it so he would not be looking "straight" out from the body and two arms with a jezail already attached.
For large areas of white clothing, I usually use Vallejo Flat Brown as my base color.
Okay the details of the figures are almost done; and, contrary to popular belief not all Pashtuns and Afghanis have black hair. Some have brown and red hair - and even a dirty blonde! The inhabitants are convinced it had to do with Alexander the Great's invasion and who's to say? People move around. The patterns on the jezail are similar to what I have seen in museums, drawings and photographs.
When I got to this stage, I suddenly realized that I had forgotten to trim the figurebase so that it would fit on a 25mm round base from Litko. After I mentally smacked myself, I removed the figure from the soda cap and carefully and slowly (!) trimmed the figure base.
Success! A few years ago I had the patio in my backyard done and I saved a lot of the rock chips from shaping the pavers. I have no idea what kind of stone it is (sure I could ask my Beautiful Bride but that would be cheating) but I have found the chips easing to break and shaped. In addition, I'm also on the look-out for rocks that I can use when I walk in the woods and they come in handy too. I use white glue to affix the rocks and I let them dry overnight.
In the above picture you can see the original grey of the figure base as I severely trimmed it to fit.-
With the rocks added, it gives the figure a sense of animation and to my mind, it'll look cool on the tabletop.
The completed figure on watch for the firangi.
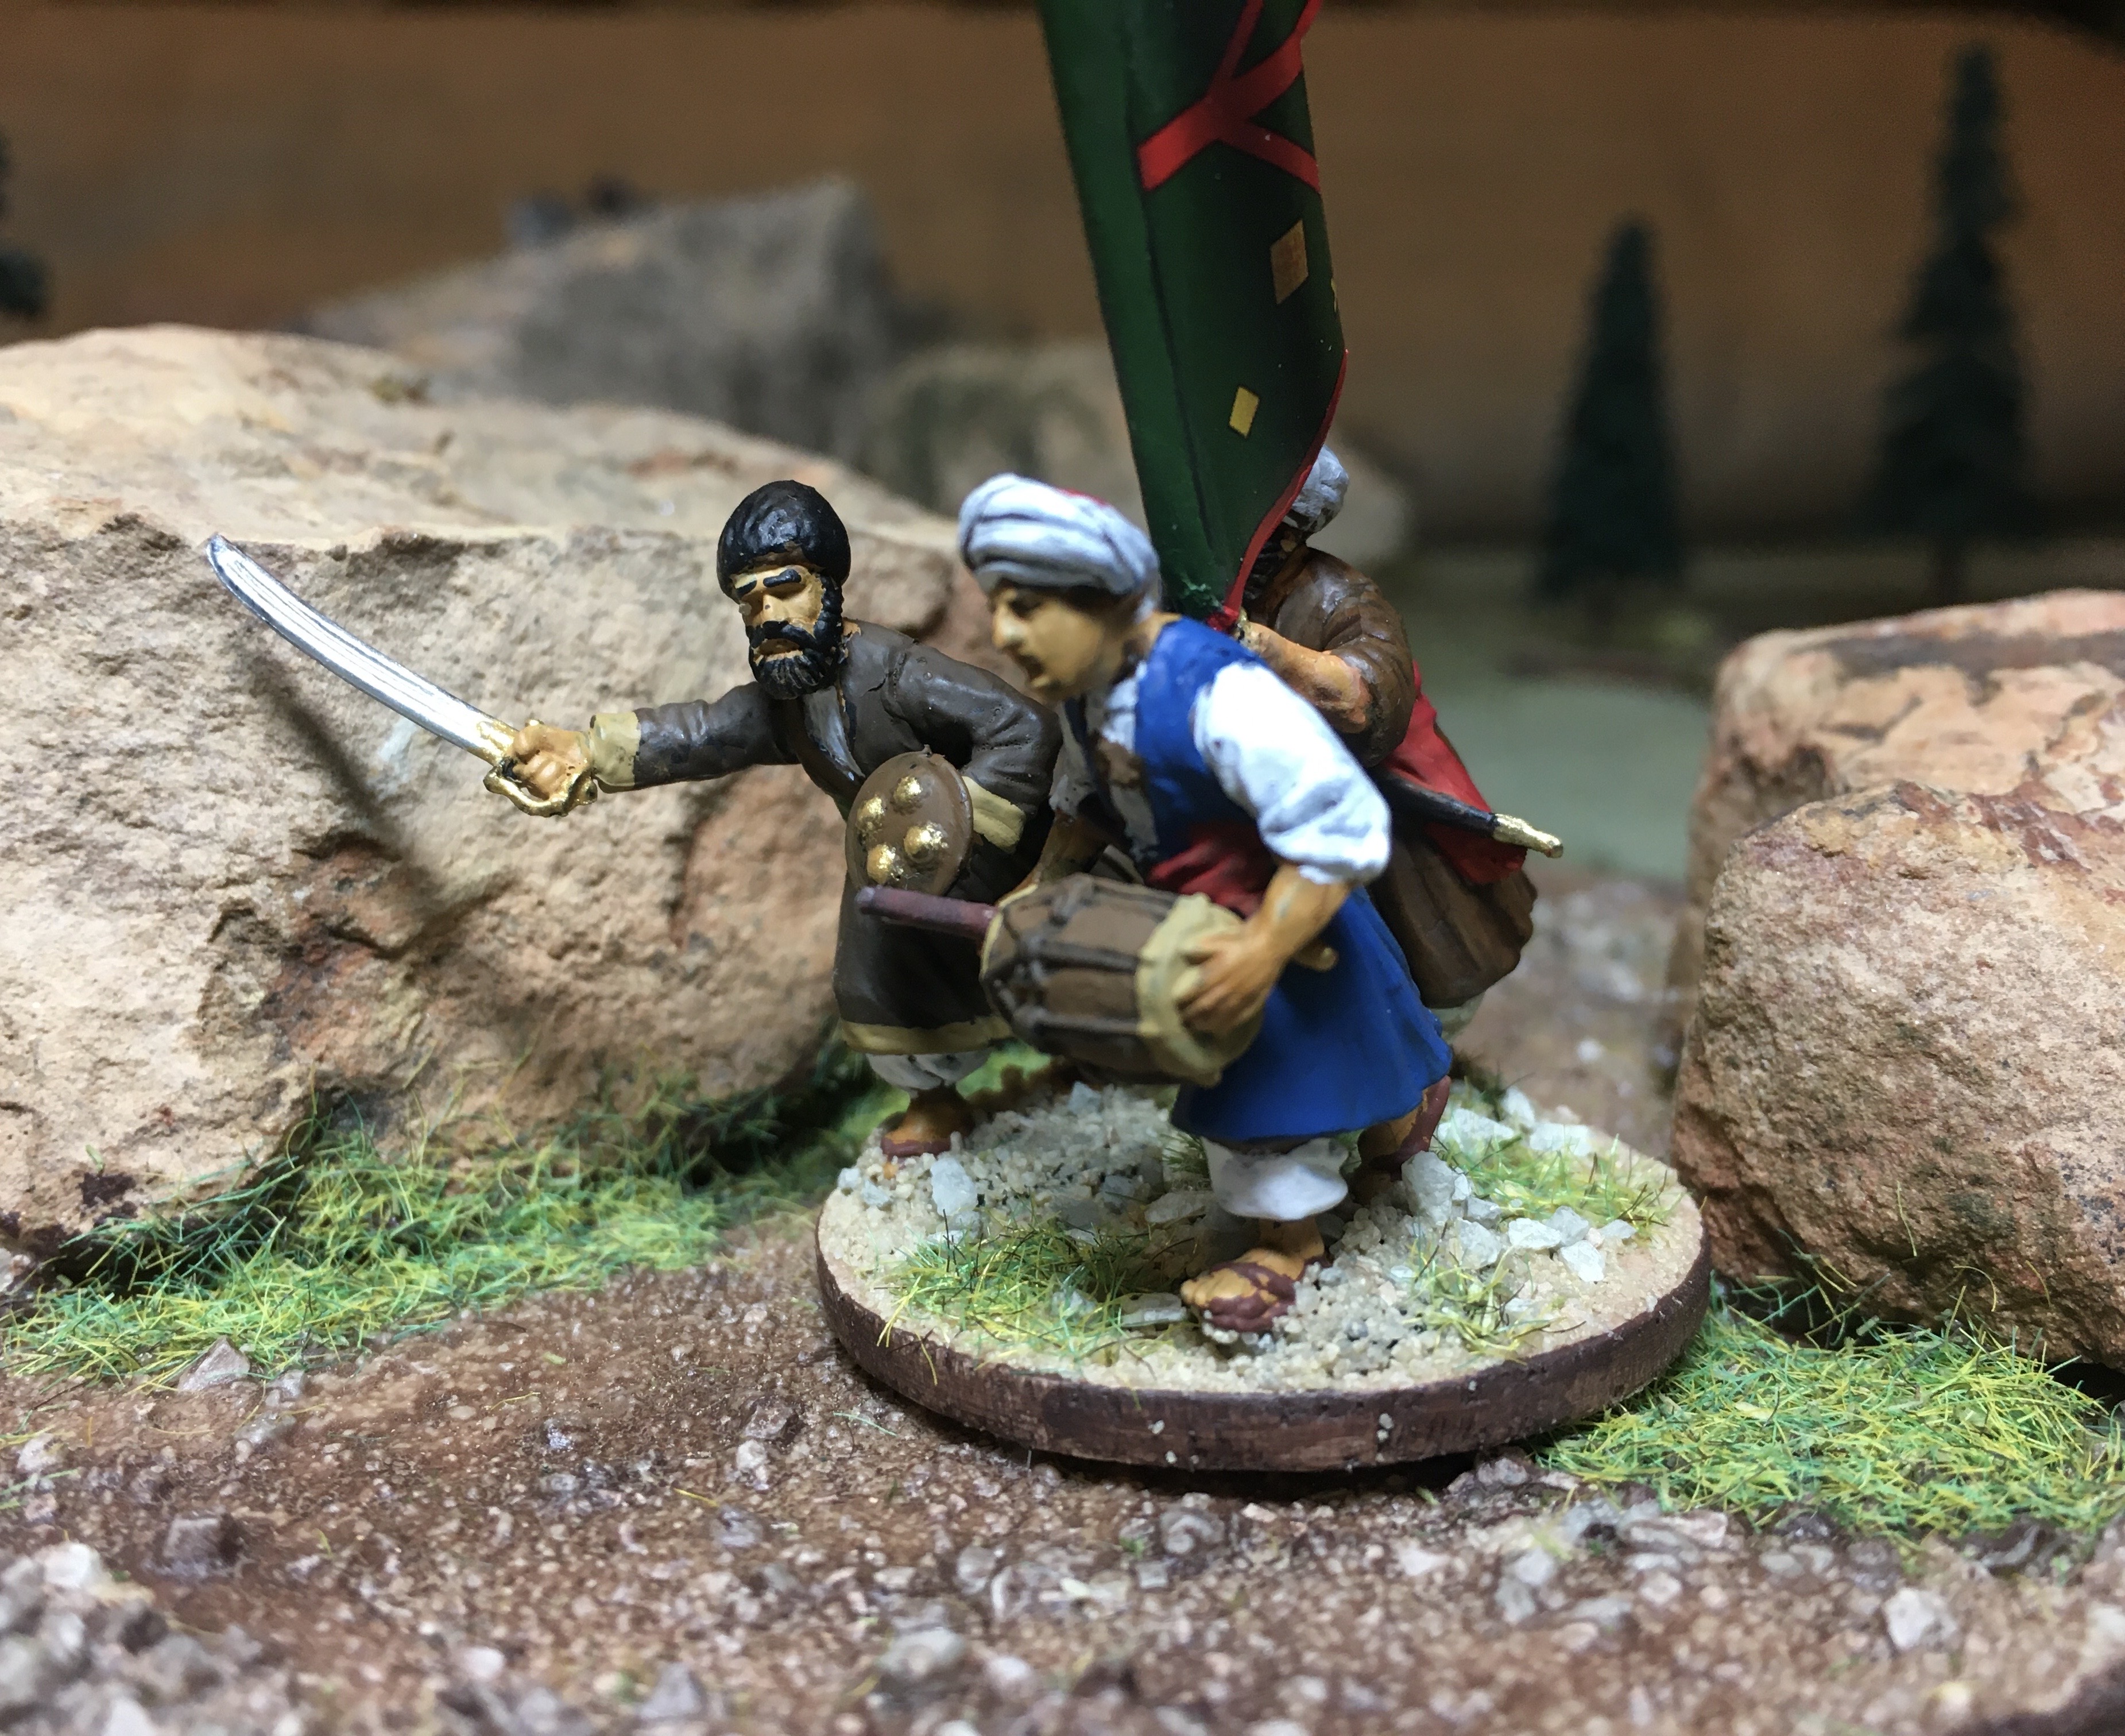
Originally I was going to use the figure on the right shooting as part of a 3 figure base, but I changed my mind and instead decided to add "Sean Connery" instead. With the figures on the left you can see how I have "grown" in the positioning of primarily the head. It really makes a difference in giving the illusion of motion instead of just having the figure look straight ahead. As I did all of the figures at the same time, you already know I learned my lesson about positioning and trimming the figure bases first before gluing to the soda caps.
Yep. Nothing like having fun trimming the base of an already painted figure.
I position the figures and rocks first before I do any gluing. Once satisfied, I glued the figures first, let when dry . . .
. . . I then glued the rocks.
The completed 3 figure base with some other single bases. Here are some other examples:
I added the jezail to the back of this figure to make him well armed. By adding the rocks there was no need for me to devise a strap for the jezail.
I added a shield to the back of this figure. As you can see the below, the positioning of the rifle also hid any need for a strap for the shield.
How 'bout those repositioned heads?
Good luck and have fun with your imagination!

.JPG)


They all look very good, even if I have no intentions of adopting any plastic in the foreseeable future!
ReplyDeleteOut of curiosity, what's to "adopt" about plastic? You can mix and match as you see fit, it's not like you must give up your metal minis if you buy one of these Perry plastics...
Delete(I personally prefer plastics because they are better for kitbashing and are less brittle than metals...)
Even though it says anonymous (what is going on with my phone?) this is Neil.
DeleteGonsalvo,
DeleteThe majority of my armies are sill going to be metal, but when you need a gazillion tribesmen in 28mm, the price is certainly right. Thanks!
Neil
Hi Neil. I haven't visited for a while but I have looked back over your previous two posts on this subject and there is certainly plenty of eye candy, as we'll as some useful tips! Now you gave me thinking, do I need some of these figures for my Pulp adventures....damn you, sir! I don't need anything else at the moment! I do like all the plastic ranges for the ease of conversion and individualisation they bring. I don't have confidence removing limbs from metal figures (heads are ok), but with plastic, it's a hell of a lot easier. Perry are my favourites but Warlord are good too. Victrix I find too fiddly, with too may separate parts per figure...nice when finished, but a bit of a hassle to put together!
ReplyDeleteI’ve had my share of disasters trying to convert metal figures too.
DeleteNeil
Really nice work! Those bases are really visually pleasing.
ReplyDeleteThanks! I think the bases really add some dash. I’ve said before that a good base can hide a myriad of painting sins.
DeleteNeil