As an Amazon Associate I earn from qualifying purchases

Tuesday, August 31, 2021

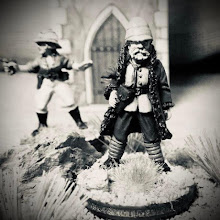
August Break Repost: 42nd Highlanders Painting Guide for The French and Indian War, Part 1


The idea of painting highlanders of any period daunts many a hobbyist and forces them to stop the urge of wetting their pants. I have painting highlanders in the following periods over the last 43 years: The English Civil War, The Jacobite Rebellion of '43, the American Revolution, the Napoleonic Wars and the Colonial Periods. I have tried many techniques and I'm going to pass on the technique I currently use.

First up, The Colonel's rules (you don't have to use them, they are merely suggestions!) of painting:

1. What will the figure look at gaming range? Each figure does not have to be an individual masterpiece.
2. For historical figures, does it look okay at gaming range? If so - we are good to go!
3. Unless asking for feedback, if other hobbyist give suggestions and you don't care for it - good for you. It's your army and you paint them how you want to look.
4. Always prime the figure. Paint sticks to paint. 
5. There is no "this is the only way" you can paint the figure. Also, colors fade in the field.
6. At the end of the day, we are grown men and women that play with toy soldiers.

Okay - let's get started. The figures we are using are all from Warlord Games.

Step 1. Prime the figure. It does not matter what color you use; whether it is black, white, grey or brown - but I would avoid the hot pink. The overwhelming majority of the time I use black mainly because it helps with shading and hides most of the mistakes I make. I do not buy an expensive can of primer. I use the 98 cents can of Flat Black Primer from Home Depot. After the primer is dry, I paint the flesh first. I used Vallejo Dark Flesh. (Unless specifically mentioned, all the paints are Vallejo.)

Step 2. I then thin some GW Flesh Wash that I bought in Germany in 1998. I have no idea what it is called now. I apply the wash on the flesh so it flows into the deep recesses of the flesh to give a shading effect.

 
Step 3. I then highlight noses, ears, cheeks, etc. with Dark Flesh.
 

Step 4. I have no idea why I painted the white stockings at this point but I did using Flat White. I usually try to do all of one color at one time if practical; I also try to work from the "inside" to the outside.

Step 5. I suddenly realized I had no idea what the Grenadier mitre caps looked like. While the white was drying Mr. Google helped me out and I painted red parts Flat Red.


 Step 6. I painted the bonnet Dark Prussian blue and the band and touri (the little ball on top) Flat Red.

Step 7. Since the red was out, I painted the short highland jackets Flat Red. With one coat you can see how the black primer is helping with the shading but I did have to go back on some figures and add a second coat in select areas.

Step 8. I did the grenadier jackets at the same time and then kinda/sorta dried brushed the plate on the mitre cap with Flat White. With my eyes at this age, there was no way I was going to try and get the pattern exact; but it looks excellent at "gaming" distance.

Step 9. I painted the base of the kilt Dark Army Green.


Step 10. Time for some lace and the bag with Flat White, facing colors with Green Ochre, black leather with Flat Black and the buckle with Shiny Gold.

Step 11. I painted a light second coat of the kilt (well, really painted over as a second coat) Flat Green.


Next: Details and finishing the kilt (it's not that hard!).

Sunday, August 29, 2021

August Break Repost: French and Indian War Disorder markers for Rebels and Patriots


The Highland Light Infantry unit has one disorder.

I'm a big fan on using markers to reduce paperwork in a game and they are great visual reminders of what exactly is the status of that unit. I also don't like clutter (personal opinion - nothing wrong with it if you play that way) with cards and a gazillion printed status markers following a unit. Whenever possible (read fiscally possible!) I try to make markers that will blend in with the tabletop battle itself. That's not always possible in big games; but, in a game the scale of Rebels and Patriots (paid link) it is easily doable with some leftover figures, the bits box, a little basing material, and sticks and rocks I find outside.

Highland Regiment disorder markers.
 
What I decided to do was to use 40mm round stands for the unit disorder markers. The size of the stand gives room for a small die to keep track how many disorders on the unit. Plan ahead though! Lay out your large basing material (figures, sticks, rocks) before gluing to ensure the die fits. For the permanent disorder marker I decided to use a 25mm round stand. In Rebels and Patriots the permanent disorder marker, once placed, is not removed.
 
Here is a selection of some of the markers I did:
 
Generic French
 
More French
 
Indians
 
Generic Unit
 
Highland Light Infantry
 
British Ranger Unit
 
One last look at the Generic French.
 
As you can see, some markers match units and some are generic. It really doesn't matter as probably (because I have run out of figures) the rest of the markers will probably be just terrain to be used by both sides. See you next time.

Friday, August 27, 2021

August Break Repost: The Native War Band is Complete!

August is brutal where I live! At least that's the story I'm sticking with for my August break. Please enjoy this popular post from the past:

Except for the figure on the rock (Magua from Warlord Games), all figures came from the boxed metal set (19 in total) from Warlord Games.

As readers of the blog know, I've been painting 6 figures at a time of my Native Warband to: 

a. Individually painted figures (non-production line) take longer.
b. To give me a "creative" break between groups.

Stole this from A J's Wargames Table.

I had a great time painting these figures for the French and Indian War as I have never painted Native Americans (except for one US deputy marshal in the Wild West) and I had a great time looking at primary source illustrations, reading eyewitness accounts, and looking at what contemporary artists have done.

The last six, primarily based on descriptions of the Battle of Bushy Run.

For the entire War Band of 18 figures (categorized as Large for Rebels and Patriots if I use all 18) I went with the 3, 2, 1 alternative basing for the game which really gives an "irregular" look to the unit. In addition, I was able to add some extra details to the larger bases to make mini vignettes.

"3"

"2"

"1"

Okay it is self-indulgent time as I post various pictures of the completed War Band:


Wednesday, August 25, 2021

Taking an August Break Re-Post: My Afrika Korps miniatures featured in A Wargamers Guide to The Desert War 1940 - 1943

 I'm honored to have some of my Afrika Korps miniatures featured in Daniel Mersey's latest book A Wargamers's Guide to The Desert War 1940-1943 available on Amazon and at other fine retailers.


It's humbling to see miniatures you have painted in the same company with Michael Perry of Perry Miniatures, Wargames Illustrated and Big Lee himself!  (If you have not seen Big Lee's Miniature Adventures, you are in for a treat!)

Afrika Korps 88mm Gun featured in the book

If you want to see the other photos, you have to buy Dan's book!  Here is the summary: Continuing this exciting new series of guides for wargamers, Dan Mersey gives a wargamer's perspective on the North African campaign of World War II. Dan gives an overview of events from the opening British successes against the Italians, to the famous duels between Monty and the Rommel (the Desert Fox), right up to the US-led invasion of Operation Torch and the eventual defeat of the Afrika Korps, and offers advice on how to recreate these on the gaming table. Daniel 


Mersey discusses factors to consider when choosing an appropriate set of commercially available rules, or devising your own, to best suit the scale and style of battle you want and to capture the flavor of the period. The relevant ranges of figures and vehicle models are also reviewed. Analysis of the forces involved, organization, tactics and strategies will help with building your armies and there are interesting scenarios included. Whether this is a new period for you, or you are looking to refresh your existing interest in the period, this handy guide is sure to hold much if interest for you.

Wednesday, August 18, 2021

August Break Repost: Kong


Kong of Skull Island

I think we have all done it - the shiny new toy syndrome. I know I have and I have done it again but with a twist. One of my favorite Adventuring Companies/Leagues/whatever game you are playing is Lord Greystoke's: better known as Tarzan of the Apes. When I saw the advertisement for the new Giant Ape from Wizkids, I thought to myself, "Self, that would make an excellent addition as a Mangani (Great Ape) for Tarzan's team!" The smaller figures come two to a pack and I thought this would be excellent.

 Tarzan and my current mangani which came from a toy set of African animals.

Tarzan and the new mangani. Hmmm . . . something doesn't look right.

Imagine my surprise when the Giant Ape came and I opened the package and there was a . . . well . . . Giant Ape! Yikes. That'll teach me not to read the entire description including dimensions and size. On the gripping hand, it's a beautiful figure and I know it will be featured soon in one of my games. 


Painting black figures can be a challenge to bring out the detail; fortunately this figure is well sculpted for dry brushing so I mainly used Vallejo Grey Green to bring out the details. 


The model designer out did themselves with the detail on the face.

Another view but Kong looks lighter - that's the flash ladies and gents.

Ann Darrow had to show up sooner or later.

 As Ken Watanabe said, "Let them fight."